
Beginner’s Guide to Archery Form
Aside from using a properly tuned bow, another critical element in archery is developing an effective archery form. Your bow and your form should work together perfectly so you can develop your own archery technique much easier.
Proper and effective archery form involves the mastery of the six stages of shooting. It is important to work on improving these areas in order, from assuming your stance to following your shot through. Each stage must be completed properly to achieve an effective form.
Here are the six stages of shooting in archery that you need to master in order to perfect your archery form:
Stage 1 – Assume the Shooting Position
In this stage, you assume the position of your preferred archery stance.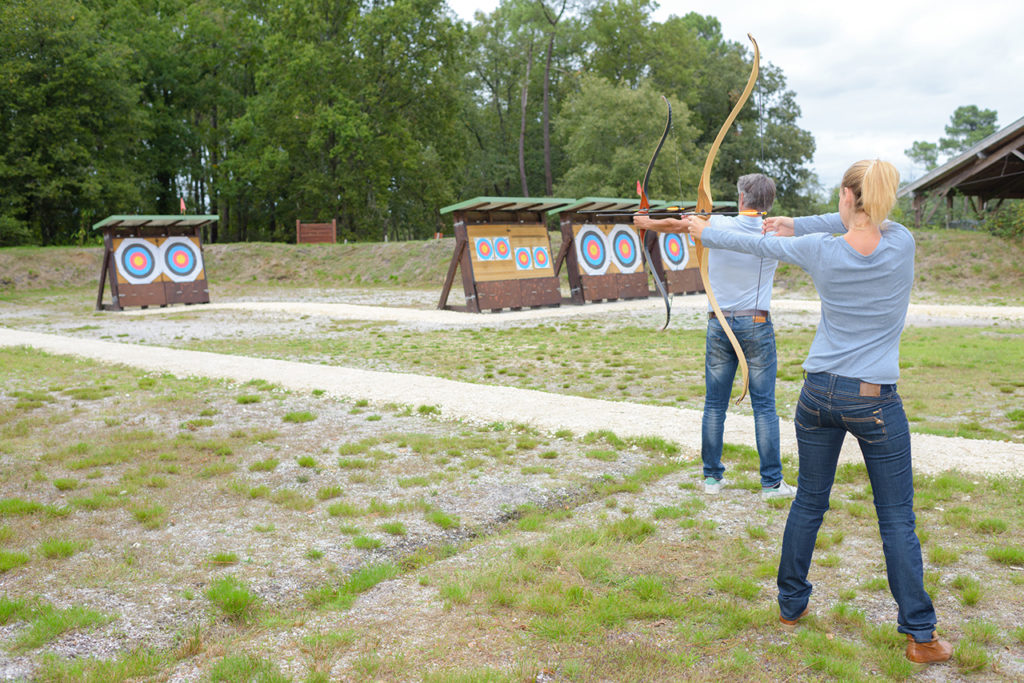
There are three stances that you can assume; the square stance, the closed stance, and the open stance. Each stance serves unique purposes that make them more helpful in certain situations. However, for beginners, I recommend starting off with the basic archery stance, the square stance.
Positioning yourself correctly for the stance is important because it’s what will set you up for shooting stability. The correct posture and body alignment can directly affect the way you rotate and move your body when you start to aim and shoot, so practicing this stance is essential to your archery success.
How to get to the square stance:
- Position each of your feet on each side of the shooting line. If you are right handed, your left foot must be placed in front of the shooting line, parallel with your right foot. For left handed archers, the right foot must be placed in front of the shooting line, parallel to your left foot.
- Place your feet shoulder width apart. This will keep you balanced and stable.
- Keep your feet in line with each other or parallel to the shooting line. A correct square stance will create a line that is perpendicular to your target. (You can measure where you are aiming by placing an arrow in line with your toes and stepping back the shooting line to see where the arrow points)
- Position your body upright and turn your head to face the target.
- Move your hips towards your core to flatten your lumbar or lower back area. At the same time, move your chest towards your core and push your shoulders downward. This creates what I call “muscular focus” where some tension is exerted to focus your muscular energy on your intention to draw, aim and shoot the target.
To perfect this stance, repetitive practice is needed. Repetition will improve your muscle strength, postural endurance, and develop muscle memory. You should dedicate some time practicing the stance while in the archery range. I suggest that you spend at least 3 practice sessions for improving your stance. You can even practice your stance at home without a bow by mentally picturing the shooting line and the target range.
Stage 2 – Nock the Arrow
 The second stage of improving your archery form the most basic step in archery is nocking the arrow. Nocking is holding the arrow and securing it in correct position by snapping its nock on the bowstring. It is pretty simple but quite tricky too. I have a hard time with this process sometimes, too. But it’s also in this process that I find out if my bow needs some tuning up.
Nocking may seem like a simple task, but it is a critical step that can affect your shooting accuracy. Since the arrow is nocked onto your bowstring, the process directly influences the direction of the release. If you nock the arrow incorrectly, your shot will surely miss.
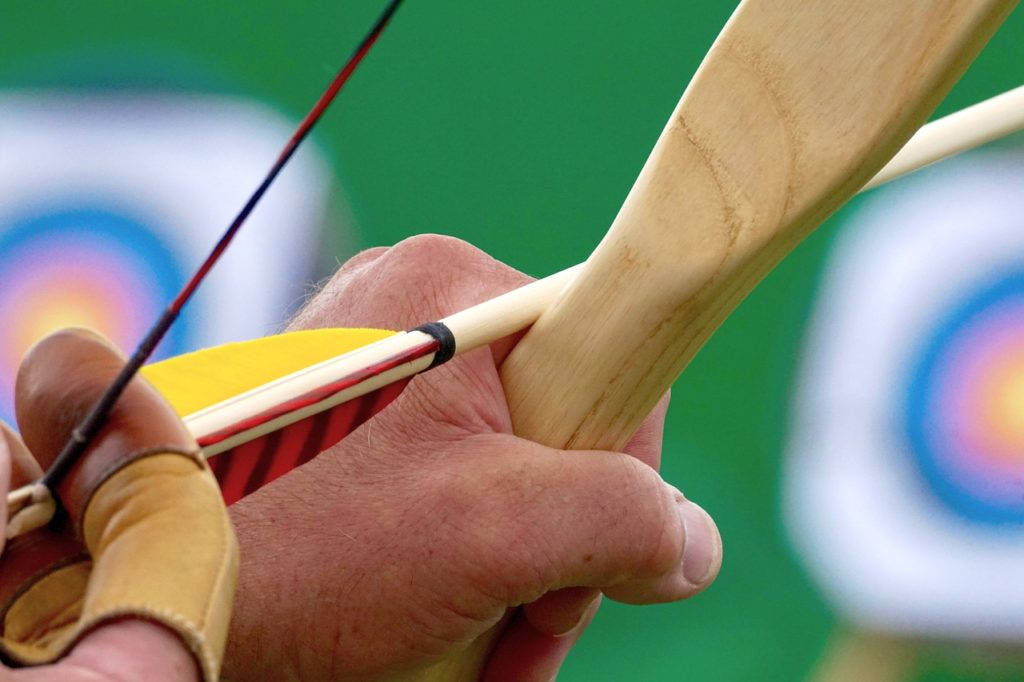
How to nock the arrow:
- Hold the arrow by the shaft part behind the vanes or fletching, right near the nock, and place it on the arrow rest.
- Rotate or turn the shaft until the index vane in the correct position. In a Recurve bow, the index vane should point opposite the riser. In a compound bow, however, the positioning will depend on the type of arrow rest used.
- Ensure that the index vane is properly aligned and then snap the nock onto the bowstring, at the nock point or below a nock locator.
- When you have positioned the arrow correctly, you are now ready to set. Setting, after nocking the arrow, is the positioning of your hands and fingers on the grip and around the bowstring.
- To set, position your bow hand (hand that holds the bow) by placing it around the grip, with the thumb pointing at the target just above the grip.
- When you raise the bow, the fingers must be relaxed and the knuckles of your arrow hand or bowstring hand (hand that holds the arrow in position and holds the bowstring back) must be flexed only slightly up to 45 degrees in angle.
- Wrap the three fingers of the bowstring hand below the arrow shaft with the string located by the first grooves of these fingers.
- The back of the bowstring hand must be relaxed as you prepare for set-up. Setting-up is the alignment of your bow arm’s elbow in relation to the proper positioning of your shoulders as you raise the bow.
- Once your bow hand and bowstring hand are in position, extend your bow arm forward by rotating the elbow vertically.
- Raise your bow arm slightly above your nose and point it towards the target. Your bow hand must be slightly positioned above your aim. As you do this, position your bowstring arm’s forearm in line with the arrow shaft and make sure the bowstring hand is positioned at your nose’s level.
- When you have properly nocked the arrow and set your arms for shooting, you’re ready to execute the next stage.
The key to proper nocking of the arrow is to focus on your hands’ movements and positioning. Identify the angles of improvement and work on them until you have achieved the correct positioning of your arms in relation to the nocked arrow and raised bow.
Stage 3 – Draw and Anchor the Bow
Drawing is a critical step in your archery form that requires correct alignment of your bowstring arm’s movements when drawing the bow. The correct angle and positioning of your bowstring arm will determine the success of your release.
How to draw the bow:
- Your drawing hand (bowstring hand) must be positioned at your nose level or slightly above it.
- Draw the bowstring back straight towards the side of your face.
- Move your drawing arm’s elbow further back and down. This will displace the draw weight onto your back muscles.
- Move or rotate your shoulder backwards and downwards, then move your drawing elbow until it is positioned parallel to the arrow shaft. If you can’t position your elbow directly at the level of the arrow shaft, you can position it slightly higher, but never lower than the arrow shaft.
- When you have drawn your bow properly, you can now proceed to anchoring.
Anchoring is the securing or locking of your body and bow into consistent position using anchor points. Anchor points can be your thumb, index finger, or the tip of your nose. You can also use a kisser button to secure your bow’s position with your body’s alignment.
For beginners, I suggest using the index finger as an anchor point. Though some beginners find using a kisser button more helpful, it does kind of affect the quality of the bow’s release because it adds more weight on the string.
How to anchor the bow:
- When you draw the string towards the side of your face, pull it back until the tip of your index finger reaches the corner of your mouth.
- Tuck your thumb into your palm but keep it relaxed. Also, your little finger must be folded towards the palm and keep it relaxed.
- Press your hands nearer to the side or your face until the index finger is resting on the corner of your mouth.
- Make sure the string is not blocked or interrupted by your nose. It should be placed to the side of the nose.
- Stand ground and hold the whole draw weight on your back by transferring it from the arms and shoulder.
- Hold your position for the next stage.
To successfully transfer the draw weight to your back, rotate or shift your torso to align it with the bow arm’s position. By aligning them, you are placing them in line with the drawing arm. Rotate your drawing arm’s shoulder towards the back, then hold. Transferring draw weight is an archery technique that needs mastery so you can hold your drawing stance more effectively.
Stage 4 – Aiming
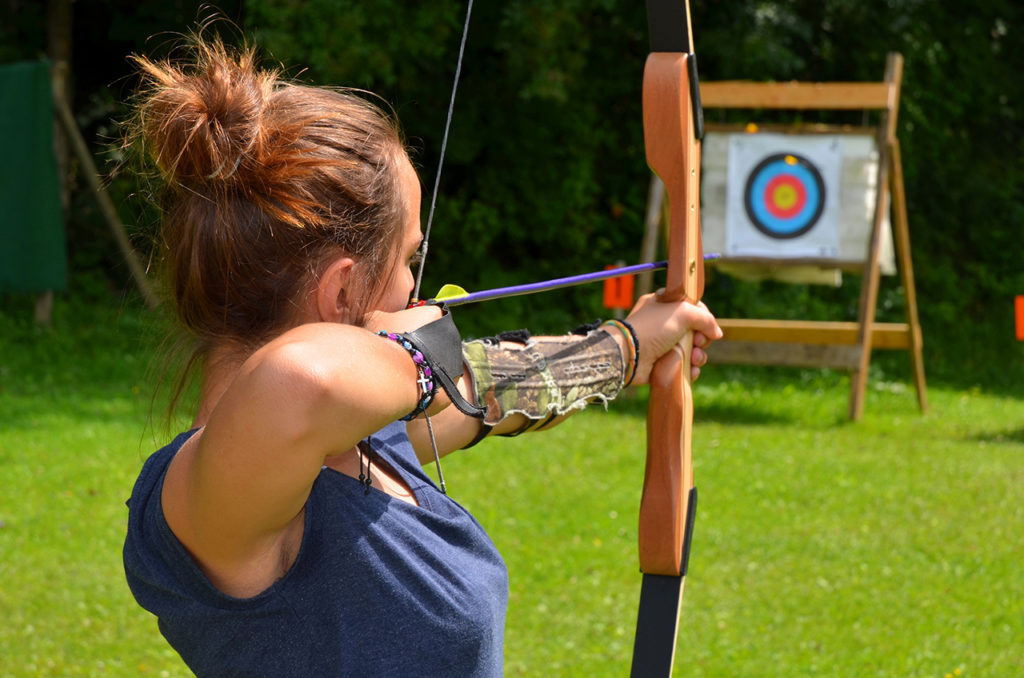 Aiming is a critical step that requires you to focus both on your target and in maintaining your archery form. If you focus either only on the target or your stance, you are likely to fail and miss.
How to aim:
- While holding, look down on the arrow’s shaft and direct its point to the target.
- Aim and pause to reevaluate your stance. If you moved a bit, realign your body and shift your weight properly. Relax your fingers.
- Sight up the string to make sure it is lined up with the bow limbs’ center.
- Refocus your attention to your target and prepare for the next stage.
Always be careful with how you refocus your attention. Make sure that you hold your position securely after refocusing on your form and avoid sudden movements that can shift your body out of alignment again. Holding your position while trying to get the best aim can be difficult, but constant practice will build endurance that will help you accomplish this stage easier.
Stage 5 – Release the String
 The release stage involves expansion, an important step where you expand your chest as you release the string. It’s like taking in a deep breath to open your core or center for the release.
How to release the string:
Man and woman practicing archery
- Expand the center of your chest by rolling your pectoral muscles outward while keeping your bow arm and shoulder stationary in position.
- As you expand, release the bowstring from your fingers by carefully pushing them out of the way.
- Continue expanding after the release but keep your position in place. The pectoral muscles should continue to expand outwards and the back muscles should increase the intensity by rolling the scapula of your shoulder towards the spine.
Expansion during the release is important because it allows the archer to get a better shot by letting the string go cleanly and smoothly.
Stage 6 – Follow Through
Following through is the final stage in the basic archery form. It takes place as you continue to expand after the release. It is like looking back on the target that you were focusing on during your aim and fully committing to hit during the release.
How to follow through:
- Relax your drawing hand after the release but keep your position and continue to increase the tension in your back muscles by rolling the shoulder’s scapula towards the spine. This will also make your
 drawing hand or arm roll towards your back.
 - Move your drawing hand straight back alongside your face. Pause just below your ear or behind your jaw.
- Keep holding the bow up in your bow hand after the release as you follow through.
- Continue the expansion of your chest and the tension of your back muscles until you see the arrow hit or reach the target.
- After the arrow hits the target, you can lower your bow and rest your drawing arm.
Most beginners think that the release is the final step because the follow through step is not clear to them. However, if you skip the follow through, you might end up committing these newbie mistakes:
- Dropping or lowering your bow right after release – dropping the bow immediately after release is the common cause of steering the arrow in a different vertical direction. This is because the arrow needs enough time to successfully clear the arrow rest and fly straight to the target.
- Moving or swaying your bow to the side to take a look at the arrow’s flight towards the target – moving the bow sideways might also cause the arrow to change direction when it fails to complete full clearance from the arrow rest.
These mistakes that steer the arrow away from the original aim do not only reduce accuracy; they can also be dangerous. The accidental steering of the arrow away from the original target leads to directing them towards accidental targets like objects, animals, or people that are positioned within a distance around the shooting range.
Concluding Tips
Now that you know the six stages of shooting, all you need to do is keep on practicing. Shooting excellence doesn’t happen overnight, it takes plenty of exercise, dedication, patience, and persistence. Remember, repetitive practice develops your muscles, so maintaining your form gets better in time.
I suggest that you create a practice plan for each of the shooting stages so you can master them one at a time. There is no stage that can be skipped or taken for granted; they are a progressive sequence of the archery form that will help you achieve archery success and mastery.