by Jackson | Oct 20, 2017 | Archery Education
Beginner’s Guide to Archery Form
Aside from using a properly tuned bow, another critical element in archery is developing an effective archery form. Your bow and your form should work together perfectly so you can develop your own archery technique much easier.
Proper and effective archery form involves the mastery of the six stages of shooting. It is important to work on improving these areas in order, from assuming your stance to following your shot through. Each stage must be completed properly to achieve an effective form.
Here are the six stages of shooting in archery that you need to master in order to perfect your archery form:
Stage 1 – Assume the Shooting Position
In this stage, you assume the position of your preferred archery stance.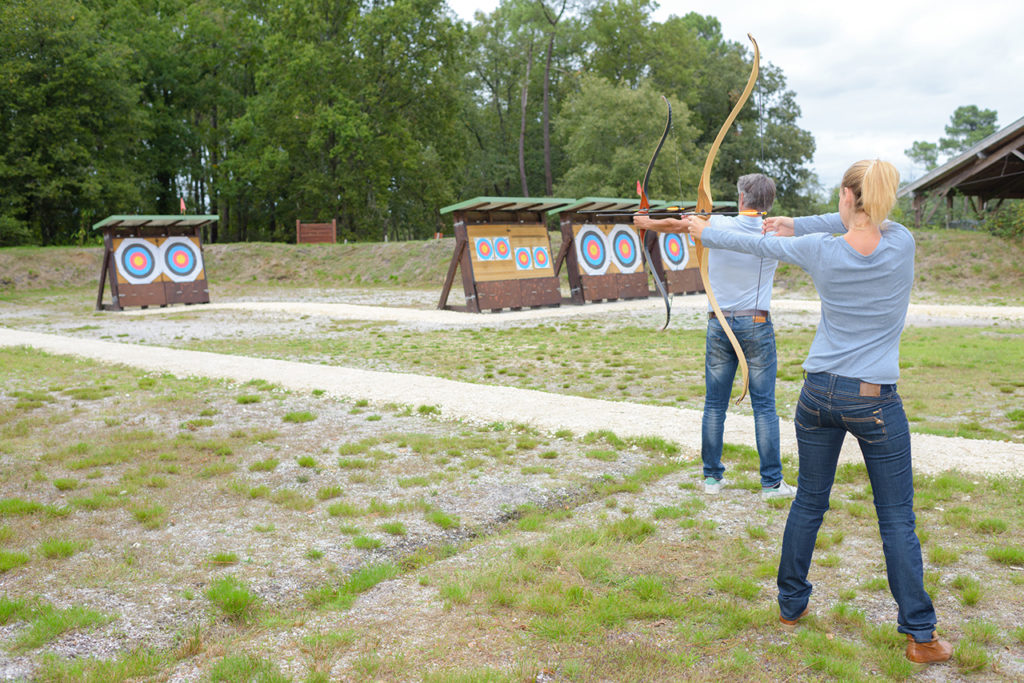
There are three stances that you can assume; the square stance, the closed stance, and the open stance. Each stance serves unique purposes that make them more helpful in certain situations. However, for beginners, I recommend starting off with the basic archery stance, the square stance.
Positioning yourself correctly for the stance is important because it’s what will set you up for shooting stability. The correct posture and body alignment can directly affect the way you rotate and move your body when you start to aim and shoot, so practicing this stance is essential to your archery success.
How to get to the square stance:
- Position each of your feet on each side of the shooting line. If you are right handed, your left foot must be placed in front of the shooting line, parallel with your right foot. For left handed archers, the right foot must be placed in front of the shooting line, parallel to your left foot.
- Place your feet shoulder width apart. This will keep you balanced and stable.
- Keep your feet in line with each other or parallel to the shooting line. A correct square stance will create a line that is perpendicular to your target. (You can measure where you are aiming by placing an arrow in line with your toes and stepping back the shooting line to see where the arrow points)
- Position your body upright and turn your head to face the target.
- Move your hips towards your core to flatten your lumbar or lower back area. At the same time, move your chest towards your core and push your shoulders downward. This creates what I call “muscular focus” where some tension is exerted to focus your muscular energy on your intention to draw, aim and shoot the target.
To perfect this stance, repetitive practice is needed. Repetition will improve your muscle strength, postural endurance, and develop muscle memory. You should dedicate some time practicing the stance while in the archery range. I suggest that you spend at least 3 practice sessions for improving your stance. You can even practice your stance at home without a bow by mentally picturing the shooting line and the target range.
Stage 2 – Nock the Arrow
 The second stage of improving your archery form the most basic step in archery is nocking the arrow. Nocking is holding the arrow and securing it in correct position by snapping its nock on the bowstring. It is pretty simple but quite tricky too. I have a hard time with this process sometimes, too. But it’s also in this process that I find out if my bow needs some tuning up.
Nocking may seem like a simple task, but it is a critical step that can affect your shooting accuracy. Since the arrow is nocked onto your bowstring, the process directly influences the direction of the release. If you nock the arrow incorrectly, your shot will surely miss.
How to nock the arrow:
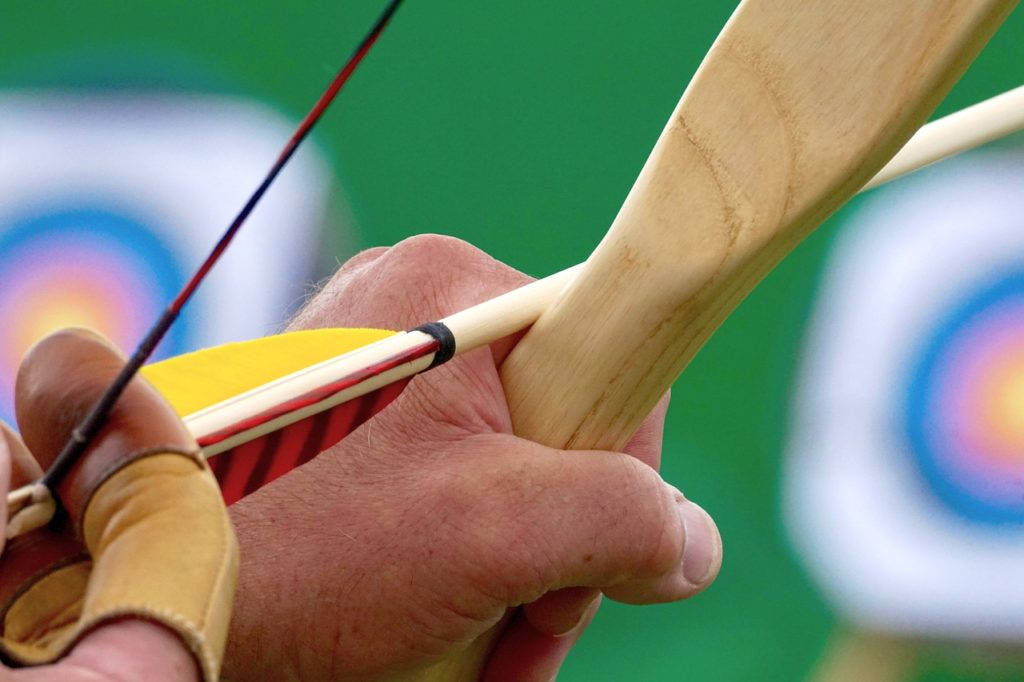
- Hold the arrow by the shaft part behind the vanes or fletching, right near the nock, and place it on the arrow rest.
- Rotate or turn the shaft until the index vane in the correct position. In a Recurve bow, the index vane should point opposite the riser. In a compound bow, however, the positioning will depend on the type of arrow rest used.
- Ensure that the index vane is properly aligned and then snap the nock onto the bowstring, at the nock point or below a nock locator.
- When you have positioned the arrow correctly, you are now ready to set. Setting, after nocking the arrow, is the positioning of your hands and fingers on the grip and around the bowstring.
- To set, position your bow hand (hand that holds the bow) by placing it around the grip, with the thumb pointing at the target just above the grip.
- When you raise the bow, the fingers must be relaxed and the knuckles of your arrow hand or bowstring hand (hand that holds the arrow in position and holds the bowstring back) must be flexed only slightly up to 45 degrees in angle.
- Wrap the three fingers of the bowstring hand below the arrow shaft with the string located by the first grooves of these fingers.
- The back of the bowstring hand must be relaxed as you prepare for set-up. Setting-up is the alignment of your bow arm’s elbow in relation to the proper positioning of your shoulders as you raise the bow.
- Once your bow hand and bowstring hand are in position, extend your bow arm forward by rotating the elbow vertically.
- Raise your bow arm slightly above your nose and point it towards the target. Your bow hand must be slightly positioned above your aim. As you do this, position your bowstring arm’s forearm in line with the arrow shaft and make sure the bowstring hand is positioned at your nose’s level.
- When you have properly nocked the arrow and set your arms for shooting, you’re ready to execute the next stage.
The key to proper nocking of the arrow is to focus on your hands’ movements and positioning. Identify the angles of improvement and work on them until you have achieved the correct positioning of your arms in relation to the nocked arrow and raised bow.
Stage 3 – Draw and Anchor the Bow
Drawing is a critical step in your archery form that requires correct alignment of your bowstring arm’s movements when drawing the bow. The correct angle and positioning of your bowstring arm will determine the success of your release.
How to draw the bow:
- Your drawing hand (bowstring hand) must be positioned at your nose level or slightly above it.
- Draw the bowstring back straight towards the side of your face.
- Move your drawing arm’s elbow further back and down. This will displace the draw weight onto your back muscles.
- Move or rotate your shoulder backwards and downwards, then move your drawing elbow until it is positioned parallel to the arrow shaft. If you can’t position your elbow directly at the level of the arrow shaft, you can position it slightly higher, but never lower than the arrow shaft.
- When you have drawn your bow properly, you can now proceed to anchoring.
Anchoring is the securing or locking of your body and bow into consistent position using anchor points. Anchor points can be your thumb, index finger, or the tip of your nose. You can also use a kisser button to secure your bow’s position with your body’s alignment.
For beginners, I suggest using the index finger as an anchor point. Though some beginners find using a kisser button more helpful, it does kind of affect the quality of the bow’s release because it adds more weight on the string.
How to anchor the bow:
- When you draw the string towards the side of your face, pull it back until the tip of your index finger reaches the corner of your mouth.
- Tuck your thumb into your palm but keep it relaxed. Also, your little finger must be folded towards the palm and keep it relaxed.
- Press your hands nearer to the side or your face until the index finger is resting on the corner of your mouth.
- Make sure the string is not blocked or interrupted by your nose. It should be placed to the side of the nose.
- Stand ground and hold the whole draw weight on your back by transferring it from the arms and shoulder.
- Hold your position for the next stage.
To successfully transfer the draw weight to your back, rotate or shift your torso to align it with the bow arm’s position. By aligning them, you are placing them in line with the drawing arm. Rotate your drawing arm’s shoulder towards the back, then hold. Transferring draw weight is an archery technique that needs mastery so you can hold your drawing stance more effectively.
Stage 4 – Aiming
 Aiming is a critical step that requires you to focus both on your target and in maintaining your archery form. If you focus either only on the target or your stance, you are likely to fail and miss.
How to aim:
- While holding, look down on the arrow’s shaft and direct its point to the target.
- Aim and pause to reevaluate your stance. If you moved a bit, realign your body and shift your weight properly. Relax your fingers.
- Sight up the string to make sure it is lined up with the bow limbs’ center.
- Refocus your attention to your target and prepare for the next stage.
Always be careful with how you refocus your attention. Make sure that you hold your position securely after refocusing on your form and avoid sudden movements that can shift your body out of alignment again. Holding your position while trying to get the best aim can be difficult, but constant practice will build endurance that will help you accomplish this stage easier.
Stage 5 – Release the String
 The release stage involves expansion, an important step where you expand your chest as you release the string. It’s like taking in a deep breath to open your core or center for the release.
How to release the string:
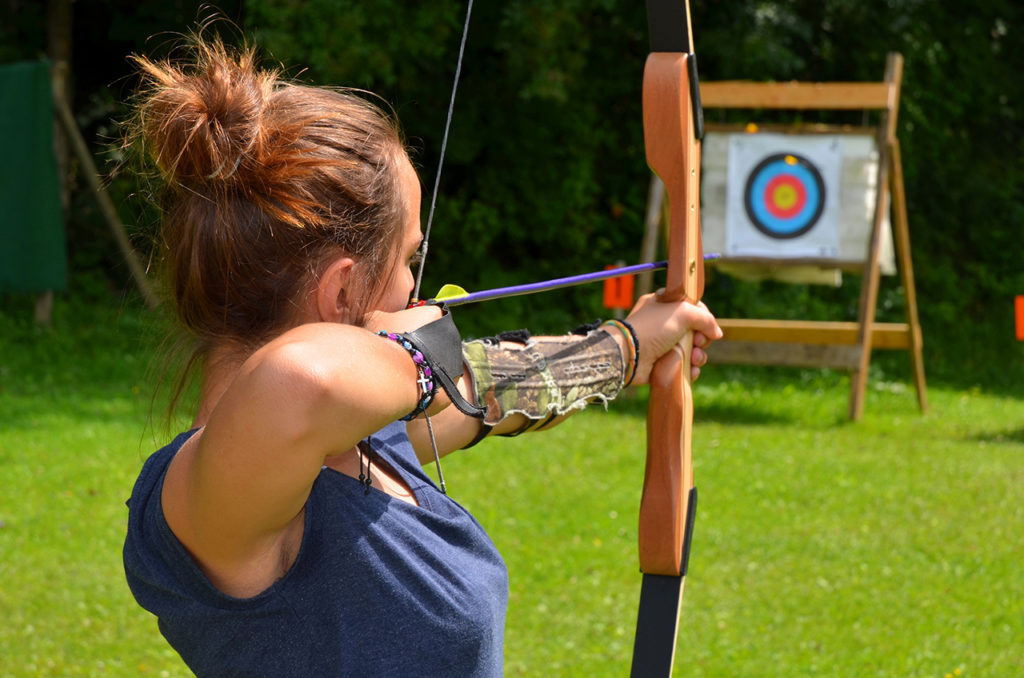
Man and woman practicing archery
- Expand the center of your chest by rolling your pectoral muscles outward while keeping your bow arm and shoulder stationary in position.
- As you expand, release the bowstring from your fingers by carefully pushing them out of the way.
- Continue expanding after the release but keep your position in place. The pectoral muscles should continue to expand outwards and the back muscles should increase the intensity by rolling the scapula of your shoulder towards the spine.
Expansion during the release is important because it allows the archer to get a better shot by letting the string go cleanly and smoothly.
Stage 6 – Follow Through
Following through is the final stage in the basic archery form. It takes place as you continue to expand after the release. It is like looking back on the target that you were focusing on during your aim and fully committing to hit during the release.
How to follow through:
- Relax your drawing hand after the release but keep your position and continue to increase the tension in your back muscles by rolling the shoulder’s scapula towards the spine. This will also make your
 drawing hand or arm roll towards your back.
- Move your drawing hand straight back alongside your face. Pause just below your ear or behind your jaw.
- Keep holding the bow up in your bow hand after the release as you follow through.
- Continue the expansion of your chest and the tension of your back muscles until you see the arrow hit or reach the target.
- After the arrow hits the target, you can lower your bow and rest your drawing arm.
Most beginners think that the release is the final step because the follow through step is not clear to them. However, if you skip the follow through, you might end up committing these newbie mistakes:
- Dropping or lowering your bow right after release – dropping the bow immediately after release is the common cause of steering the arrow in a different vertical direction. This is because the arrow needs enough time to successfully clear the arrow rest and fly straight to the target.
- Moving or swaying your bow to the side to take a look at the arrow’s flight towards the target – moving the bow sideways might also cause the arrow to change direction when it fails to complete full clearance from the arrow rest.
These mistakes that steer the arrow away from the original aim do not only reduce accuracy; they can also be dangerous. The accidental steering of the arrow away from the original target leads to directing them towards accidental targets like objects, animals, or people that are positioned within a distance around the shooting range.
Concluding Tips
Now that you know the six stages of shooting, all you need to do is keep on practicing. Shooting excellence doesn’t happen overnight, it takes plenty of exercise, dedication, patience, and persistence. Remember, repetitive practice develops your muscles, so maintaining your form gets better in time.
I suggest that you create a practice plan for each of the shooting stages so you can master them one at a time. There is no stage that can be skipped or taken for granted; they are a progressive sequence of the archery form that will help you achieve archery success and mastery.
by Jackson | Oct 11, 2015 | Archery Education
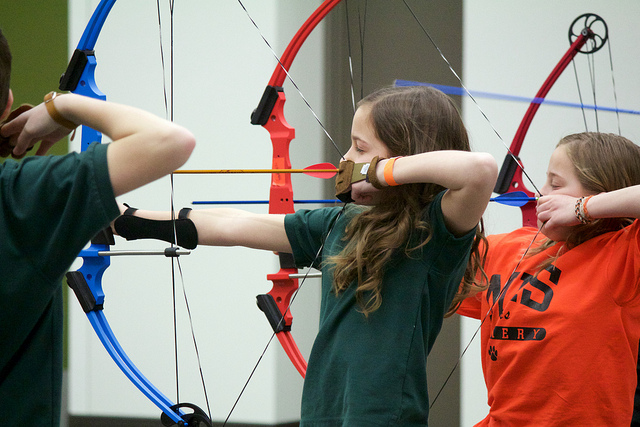
The JOAD Program
JOAD, Junior Olympic Archery Development is an archery development program that operates across America. This course is designed to teach children and teenagers the things that they need to know to progress from beginner level archery to intermediate and advanced levels. In addition to teaching youth about archery and proper techniques, the program also focuses on promoting life skills and self-confidence. Operated in USA Archery clubs across the nation, it is a simple matter to find your closest club to sign yourself or your children up for the program. To locate your nearest archery club, check out our listing of of Archery Clubs and Ranges here.
Most of the clubs have rental archery equipment available for hire for those that do not already possess their own equipment. For those interested in starting a club in their area, it is possible to establish your own club, to do so, contact a JOAD State Coordinator and talk to them about opening your own branch.
To reward achievements within the program, JOAD offers special “star pins” to recognize the accomplishments of those participating in their program. These star pins are treated as a way of observing the competency of the archers in the program based on their performance in the achievement program. The star pins all come in different colors and are decorated with a number of starts representative of the achievement level of the respective archer. The highest achievement attainable in this fashion is the 6-star pin, awarded to those who manage to shoot 6 10’s in a row.
JOAD supports archers who make use of both recurve and compound bows and offer a safe place for prospective archers to practice and improve in both of these styles of archery. Participants of the program are trained to participate in both local and national competitions. Catering for those between the ages of eight and twenty, the program is suitable for anyone between these ages and wishes to improve their archery, whether for recreational or competitive reasons.

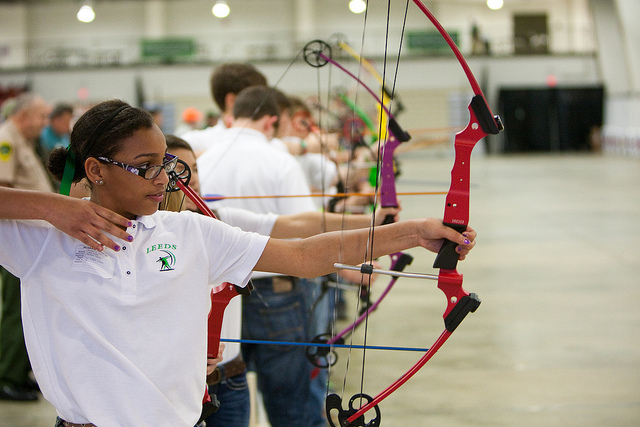
Photo by Eric Goranson
Many people who have taken part in the program previously have reported that in addition to improving their archery, JOAD allowed them to forge new friendships and team-building skills that they previously did not have. The beauty of this program is that it puts a group of like-minded and similar aged youth together and provides them with an activity that offers instant recognition of improvement and can encourage a healthy competitiveness between those in the program. Such an atmosphere is perfect for bonding and finding people with similar interests. For those who are too old to participate in JOAD or for family members who wish to partake in archery as a family, Archery USA also offers similar programs for adults.
To sign up to the program, a membership fee of $90 is required or a fee of $65 to those who previously participated in USA Archery’s Explore Archery program.
Equipment
JOAD programs are open to both recurve and compound bows and most clubs offer rental equipment so you can try both styles before you invest in the equipment that suits you best. If you are ready to take the next step and use your own equipment our reviews in both compound bows and recurve bows can help you find the bow that will cater to your needs.
For basic compound bow reviews, click here.
If recurve bows are more suitable for you click here.
by Jackson | Jun 27, 2015 | Archery Education
National Archery in the Schools Program
Introduction
The National Archery in the Schools Program, also commonly referred to as NASP, was created in order to educate children about the basics of target shooting. This program began when the Department of Education started searching for ways to enhance the attention, attendance, behavior and focus of their students. Through teaming up with the Kentucky Departments of Fish and Wildlife Resources, the NASP was created as a way to enhance the school lives of participating children. The NASP program was launched in early March, 2002, within a year of its launch, the program had been implemented across over 120 schools and catered to year levels between grades 4 and 12.
What is NASP? And What Is Their Mission?
The NASP is dedicated to teaching a generation of children the benefits of outdoors activities, the program initially considered several other sports like; fishing, hunting, hiking and catching animals as a way to engage children before they settled on the idea of teaching children the basics of archery. As the program developed and became more than a physical education program, the creators of the program came up with a mission statement, “Promote the teaching of target archery as a part of the in-school curriculum to improve educational performance of students and encourage their participation in the shooting sports.” Since its development, the program has grown steadily and today, it has interest in over 12 000 schools across 5 different countries and teaches the basics of archery to over a million students every year.
School Application
There are three branches to the design of the NASP, these three components being; the archery curriculum, teacher training and universal fit. The archery curriculum features units of study that were written and revised by educational, conservational and target archery experts to meet the educational standards of a school based program. These units of study were created to be included in a participating school’s physical education program but in some cases, schools have included the program in their history, language or art programs.
The NASP instructor training program was developed so that teachers in participating schools would be able to carry out the requirements of the program and supervise the students to keep all participants of the program safe including; students, instructors and bystanders/spectators. To date, the program has certified over 22 000 people to instruct these courses and this number is steadily increasing.
The universal fit aspect of the program means that the program is designed to cater to every student that participates, not just the ones who are good at archery, within the program, learning the process of shooting is more important than the scores that are gained during this process.
Equipment

The NASP has authorized the usage of only a single bow within its program, the official NASP
Original Genesis Bow
. This bow has an adjustable draw weight of 10-20lbs but at 20lbs draw, harnesses the same kinetic energy as an average 35lbs recurve bow. The NASP Original Genesis Bow also has zero let off, meaning that the bow has the same draw weight even at full draw. Some hunting bows have up to 80% (or higher in some cases) let-off meaning that if the draw weight of the bow was 60lbs, at full draw, the bow would let off most of that weight and reduce it to 12lbs to hold the string at full draw. The advantage of having a bow with let off is that it gives the shooter the opportunity to relax their muscles prior to taking their shot. The reason for the NASP Original Genesis Bow not making use of this feature is because it slows the rate of muscle training. The NASP Original Genesis Bow is available in both left and right handed models and features aluminum components and composite limbs, meaning that the bow is both lightweight and durable.
The NASP program has also authorized the use of only a single type of arrow within the program, the NASP Easton Full Length Aluminum Arrows. These arrows are 30 inches in length, feature 7075 aerospace alloy (the same grade of aluminum used in the creation of aircraft and other aeronautical equipment) a nickel plated target point. These arrows are very lightweight and can withstand a large amount of punishment, due to the fact that these are aluminum arrows they can also be bent back into shape if they are shot into a harder surface and warp under the impact pressure. The nocks and vanes of the arrows can be easily replaced if they undergo strenuous hardship and replacement parts are readily available.

by Jackson | May 31, 2015 | Archery Education
Introduction
Archery is the skill or practice of using bows to propel arrows. The word archery comes from a Latin word arcus. Historically, archery was used for combat and hunting. Today it is mainly a recreational activity and a competitive sport. The pinnacle of competitive archery is represented by Olympic archery. Someone who is an expert or fond of archery is usually known as a Toxophilite.
Getting Started
Archery clubs are reasonably prevalent and most of them welcome new archers with open hands. Archery is a great sport even for families and you can take everyone in your family from your grandma to your 6 year old. It is also an amazing sport for those with disabilities (they usually compete against other able bodied competitors in tournaments). A club membership usually costs around $50 annually depending on the location and size of the club. You can also participate in archery throughout the year as most clubs usually move indoors during winter. The indoor sessions usually run from October to around March, when you can easily shoot in sports halls, church halls and so on.
If you interested in finding an archery club you can start with our extensive listing of archery clubs, click here. You can also try the International Field Archery Association or USA Archery.
Most clubs require beginners to have some little tuition before allowing you to shoot the arrows on your own. Beginners normally start with targets that are about 10-15 yard away and then the distance will be increased gradually as you improve your skills. You can become proficient in archery after about six to eight weeks of training.
Qualification To Olympics
All qualification spots in archery are usually allocated to National committees rather than the individual athletes. There are four main ways for National Olympic Committees to earn spots in Olympic archery. No national committee is allowed to field more than 3 archers of either gender. The host nation is usually guaranteed 3 spots for each gender. The most recent World Target Competition top 8 teams receive 3 spots each and the top 19 archers after the team qualifiers also get spots to represent their countries. Then 15 of the 18 remaining slots are divided among the 5 main Olympic continents for continental spots. The remaining 3 slots are normally determined by the Tripartite Commission Invitation.
Each National Olympic Committee that gets 3 spots for individual archers like the host nation and the top 8 ranked teams and any other country that takes 3 out of the remaining 37 spots can compete as a united team in the team competition category. The minimum age required for any Olympic archer is at least 16 years.
Competition at Modern Olympic archery mainly consists of 4 main events, men’s team, women’s team, women’s individual team and men’s individual team. In all the events the distance between the target and the archer is usually 70 meters. Individual tournaments normally consists of 64 archers. The competition starts with ranking. Each athlete shoots around 72 arrows (in 6 groups, or ends of 12 arrows).After that, the archers are then ranked by their score to establish their score for the elimination bracket. Then the final rankings are determined by the score each archer got in the round that they were defeated, with every archer that was defeated in the first round ranked through 33rd to 64th.The round usually pits the 1st ranked athlete against the 64th,the 63rd against the 2nd and so on. The athlete with highest score after 18 arrows proceeds to the next round while the loser is eliminated from the completion.
After 3 such rounds, there will only be 8 archers left in the competition. The remaining rounds are the quarters, semis and medal matches, which are referred to as the main finals. They normally consist of every archer shooting around 12 arrows in ends of 3 arrows. Here the two competing archers alternate by arrow instead of shooting simultaneously like in the initial 3 rounds. The losers in the quarterfinals are eliminated from the competition while loses in the semis fight it off to determine the fourth place and the bronze medalist. The winner between the two undefeated archers takes the gold medal while the loser gets the silver medal.
Archery Equipment
When you are first starting out, archery clubs will usually provide trainees with the required equipment so at first you will not need any but over time you will need to buy your own equipment. Wear stable shoes like golf shoes or good runners. Do not wear any type of heels that could unbalance or inconvenience you.
Other equipment includes:
Archery armguard – A guard that protects the arm from the bowstring
Bohning Slip On Armguard
This armguard is easy to slip on without the need for any straps or clips to fit. It is comfortable to wear and comes available in 3 sizes so you are able to ensure a good fit. It is great for target and 3D shooting.
Arrows –
–
Arrows have a diameter of up to 9.3mm, but for less wind drift and faster flight most are usually as small as 5.5mm. Each archer usually has their arrows marked with distinctive colors to distinguish owners.
Bow -Most competition bows have a draw weight of about 50 pounds for men and around 40 pounds for women. In Olympic competition the only bows permitted are recurve bows. The recurve bow has 4 main parts; 2 limbs, the riser and the string, recurve bows are sometimes referred to as takedown bows as they can be taken apart for easy storage. Examples of commonly used recurve bows include: Samick Sage Takedown Recurve Bow , Bear Grizzly Recurve Bow
 and the PSE Mustang Recurve Bow
 .
.
Compound bows may be used in National competitions, however they are not permitted in Olympic competition. The compound bow is a bit different from the recurve bow and it cannot be taken apart for storage. Examples include: Genesis Bow , Infinite Edge Bow
 , PSE Stinger
 and the Bear Archery Youth Bow
 .
.
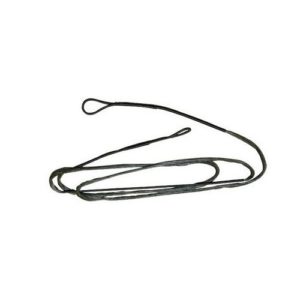
Bowstring
-This is the string of the bow. Most of the bowstrings are usually made of high quality polythene fibers.
Chest-guard-It is either leather or plastic used to keep out the archer’s clothing from the way and for protecting against other body injuries.
Shooting glove or Finger tab-This is a flat piece of leather usually worn to protect the fingers when an archer releases the arrow.
Quiver-This is a container used for holding the arrows and is normally worn around the waist.
Sight-This is a device that is usually placed on the bow to aid the athlete aim correctly, it is also called bows light
Stabilizer-This is a small weight usually mounted on top of the bow to stabilize it after or during a shot.
For more information on getting started in archery, click here.
For information on junior compound bows, click here to read my review of the best beginners compound bows
by Jackson | May 9, 2015 | Archery Education
Introduction to Instinctive Archery
Originally bows and arrows were created and fashioned out of natural wood. Shooting an arrow was done by simply drawing back the bow with the string, taking a general aim, then letting it loose. There was no additional equipment, only instincts and an inner sense guiding the person. Today, this is known as instinctive archery. In this article the basics of instinctive archery will be explained – the equipment required, and the best natural stance to assume when shooting instinctively to improve your aim.
Some people are born with natural gifts and talents in sports such as archery and many others. This becomes evident when they first pick up a bow, an arrow, then shoot with remarkable precision on their first attempt. Others who are less gifted will need to traverse the well-worn road of practice to achieve excellence.
The instinctive archery aspect is much like how we throw a baseball at the exact spot where we want it, or a stone to hit a target- it is completely natural, and follows the bodies’ internal compass, plus the essential mind and muscle coordination to make it happen. Instinctive archery, or “snap-shooting”, was adapted for more practical reasons other than sport. It was used mainly for hunting food and game, where little time and concentration is given, before the target runs away. Emphasis in instinctive archery is placed more on the archer’s skill rather than the use of sights or a prolonged aim and is completed more by feel.
As with any new skill, the most important part of mastering it, is the need to practice, which trains the brain and the muscles involved and thereby increases the chance of an precise and accurate shot. With sufficient practice this new way of shooting will become second nature or natural for you. In order to find success with this new shooting style, you must prepare, so for more information read on below.
A Guide To Instinctive Archery Basics
First off you require a solid starting point for instinctive archery and this starts with a properly placed arrow rest and nocking point to serve as a solid guide. It can be adjusted as you become more comfortable with style of shooting. You will find different nock points based on the type of bow you may be using, such as a longbow or a recurve bow. Use the same equipment each time when learning, doing this will eliminate any inconsistencies with your equipment whilst practicing.
Next you require a consistent form to create a solid base on which to build. The goal in this exercise is to recreate the correct pose and shooting motion each time, much like basketball players perfecting their shot motion or golfers, their swing.
The key to creating this form is your stance, draw and anchor, and finally the release. We need to start from the correct position, a nice smooth draw remaining balanced and then holding at your anchor point. I use my fingers just touching the corner of my mouth as my reference, however, there are a lot of variations from this common point. What is essential is that you come to exactly the same point each time. By maintaining the same stance and utilizing the same draw each time induces consistency. Consistency is particularly important when learning any new skill such as this, do the basics well and everything else looks after itself.
Starting with a stance that puts your feet about shoulder width apart, ideally with your toes pointing at 90 degrees to your target and the balls of your feet aligned with the aiming point. With your weight slightly more onto your front foot so your weight is going in the direction of your shot. The bow is normally gripped by the non-dominant hand and allows the pointer finger to do its job of pointing directly to the target when you raise the bow. Keep in mind that different bow types have features that make it easier to grip, and you might be unaccustomed to this kind of grip before, but with practice it becomes second nature. The most natural and intuitive way to become better at instinctive archery is to always keep your wrist, arm and pointer finger in alignment- in this manner, you should experience less problems and become more accurate more quickly.
Now nock an arrow just underneath your nocking point. It should rest on the same side as the back of your hand that is gripping the bow. ‘Gripping the bow’ is a bit of a misnomer, in so much as the bow isn’t actually gripped but rests (or pulled back) against the palm of your bow hand as the arrow is drawn. Consider slightly tilting your bow to where the arrow cannot fall off, and remains in position even when you shift. Hold the string with your dominant hand with a traditional grip. Generally, the pointer, middle and the ring fingers are utilized in holding the string. The bow’s string should be handled with the fingertips’ meaty pads between the tip of the finger and the finger’s first joint. If you find that it is too hard to draw the bow in this manner, choose a lighter bow until you can draw without too much trouble. I recommend that you also protect your fingers over a long practice session with a finger tab or shooting gloves. For my review of the best archery gloves click here. Your string hand should maintain a straight line just behind the arrow, from the fingertips to the wrist and extending to the elbow. The arm should look like a natural extension of the arrow. The bow itself is drawn not one-sided, but use a combination of pulling with the dominant arm that grips the string and pushing with arm that holds the bow.
A fully drawn bow needs an anchor point to get to the next step. Finding and establishing a good anchor point is also one of the most important technique in learning instinctive archery because it allows you to consistently maintain a draw length where you are able to comfortably position the arrow aiming towards the target. The most recommended anchor point is where the string is drawn back to where the middle finger ends and touches the corner of the mouth. This position is the most common and most reliable anchor point, so use it well and often.
Release the arrow by relaxing the back of the hand, optimally about the time the finger comes in contact with the anchor point. An excellent release would be where the draw hand is exactly where it was before and after the shot was made.
The real skill in following the instinctive archery path is the ability to focus on the target and nothing else. Instinctive archery is all about skill and focusing intently on the target and forgetting about everything else in the moment. To achieve this start focusing on the target intently even before the bow is drawn.Once you have your focus solely on the target, then and only then should you commence the draw.
It is essential that the bow is not held at full draw for long – fight the urge to carefully aim and just use your gut instincts.
Keep the focus and fine-tune your form to whichever works for you in the long run.
I recommend starting over a short distance say up to 7 yards. It serves no purpose trying to much your first shots instinctively over 30 yards and miss the target every time. Start from a short distance initially and then work back as your skill improves. This is a much more rewarding way of commencing this skill and ensures that you are more likely to continue as your skill improves.
To learn how to increase your accuracy click here.
Remember that instinctive archery is skill-based and you will benefit tremendously with time and practice. Don’t fret too much if the starting shots were not to good – focus and it will get better.
by Jackson | Mar 21, 2015 | Archery Education
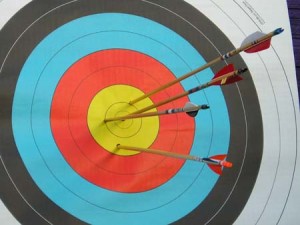
I hate missing, and I sure hate missing by a long shot. It’s really not that cool and it makes me feel dumb. Getting better at your accuracy and consistently being able to hit your target is a HUGE deal and you shouldn’t ignore it. Let me point out that I lost a competition by completely missing the target at 25 yards. You think I felt foolish, you bet I did.
Start from the ground up
Everything starts with your feet. They are the table on which everything else is built. Many people like to stand like a golfer with both feet in line making a point towards your target. It can work pretty well for most, but you’d be amazed at how much better your form can get with just a couple minor adjustments.
First, while you’re out shooting, take your front foot and move it one inch to the side. Take a few shots and then move it another inch over. After you’ve done this a few times, now move your front foot forwards by an inch. You’ll feel a difference in which muscles are tightened and how it feels with the alignment of your bones. You should also try this with your back foot as well. For me, I found that having my front foot forward about three inches gave me the best alignment and muscle contraction repeatedly.
Squeeze it
Tighten your abs and back when you are shooting. I found that when I consistently tightened up my core as I was shooting that I had less shaking and more stability. If you think of yourself as a table, the feet are the base and your torso is the trunk so you need to make sure that it stays the same for each shot. All that being said, you still need to try shooting with a relaxed torso and a tightened one to see which works for your body the best.
Let your bones do the work
Muscles wear out a lot faster than bones. If you hold the bow straight out to the side with your arm in line with your shoulders, you’ll be letting your bones take the brunt of the force of holding the bow. This doesn’t seem like a big deal for a few shots, but when you’re shooting hundreds of shots it gets really tiring.
This also applies to pulling back the bow a bit. Drawing back on the bow when you have bad posture or are too weak will make you use more muscles and experience more fatigue faster. So don’t, even though it’s really easy.
Be efficient
The best thing to improve accuracy is to be as efficient as possible. You want your muscles to last as long as they can with the least amount of fatigue. Pay attention to using large muscles to do most of the work. When you draw back on the bow, try to make your upper back muscles do all the work. They are the biggest muscle group and will last the longest. Using your biceps more will make your arm fatigue faster plus make your arm more shaky.
Uphill and downhill
Lots of times you aren’t shooting perfectly level. The biggest trick to getting better at these types of shots is to go back to the table idea. You want to make your base as solid as possible. Get a good footing and bend at the waist. You don’t want to change anything above your waist if possible. If you move your arms instead, you’ve completely changed your entire form and that causes more problems and increased fatigue.
It might feel silly at first, but it will make you more consistent and that means better accuracy.
Workout
Really? Yes, you need to work out your stabilizer muscles. Think about it, most people shake when their muscles are getting over used or are pretty fatigued. So work on the muscles that will get fatigued. The big one for me is my deltoids muscle, a.k.a. the shoulder. Just grab a 5-10 pound weight and hold it out like it’s your bow for about 5-10 minutes a day. That’s not so bad, but it will really improve your accuracy. You will have to see which muscles get tired the fastest or cause you the most issues after lots of shooting. Now I’m not a doctor so make sure you check with one of those guys if you need to.
Form shooting
This is a neat little trick too. The idea is to get 5-10 yards from a target and just shoot for the middle. You’re not trying to aim at all. The whole point is to feel your body is moving the exact same way. Don’t even pay attention to aiming really. You can also try shooting with your eyes closed, be extremely careful, to see if your arrow ends up in the same spot. You’re just focusing on consistently taking the same actions with your body.
Pre-shot routine
Archery is a huge mental game. Come up with a routine that is short, but that you do every single time that you take a shot. It could be something simple like taking a deep breath or a little more complex like rubbing your hands and picking your nose. It doesn’t really matter as long as it prepares your mind to do take the shot. I actually learned this from some golfers saying the it really upped their game because it helps you to always get in the right frame of mind
I have an e-book that I recommend if you want help getting better at your game. There is loads of great information in it and I’m willing to bet that even the most experienced person will learn something. If you disagree, just tell me.
For more tips on archery education click here…