by Jackson | Nov 20, 2017 | Archery Accessories, Reviews
A Guide to Peep Sights
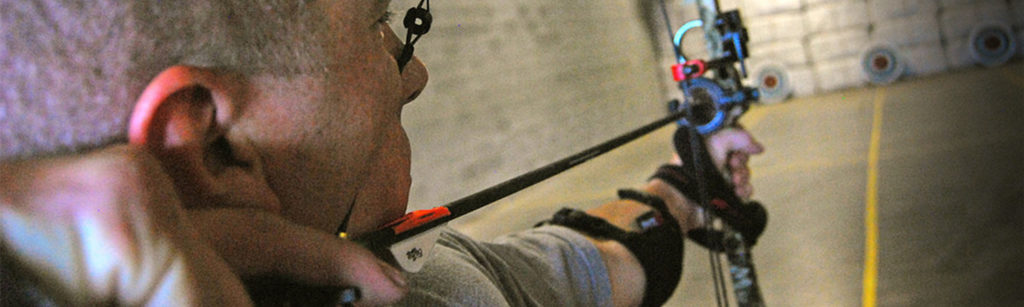
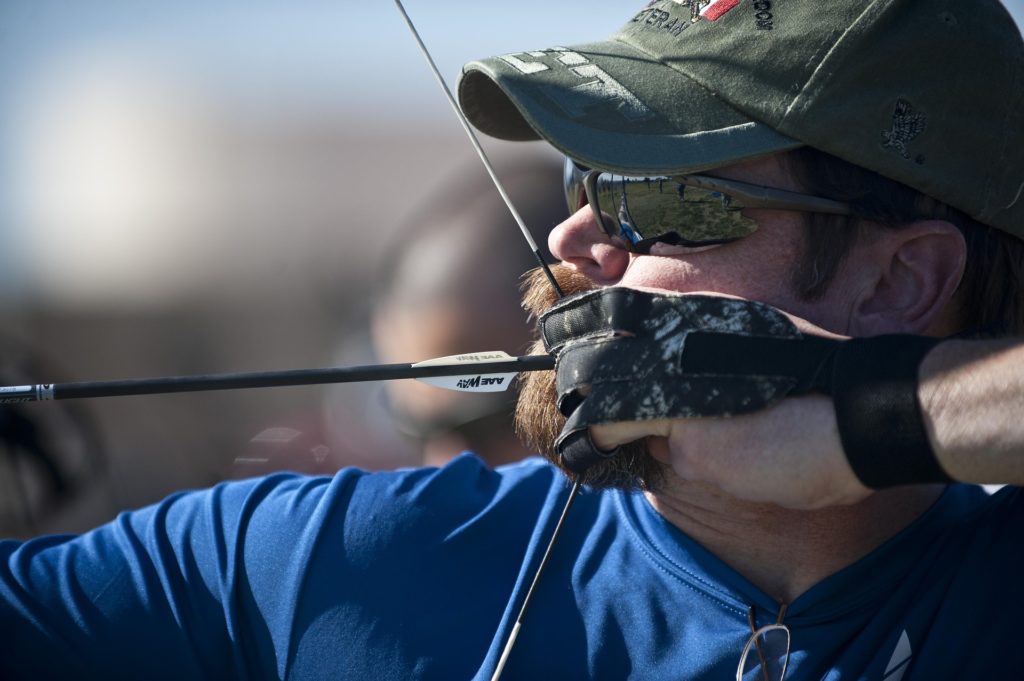
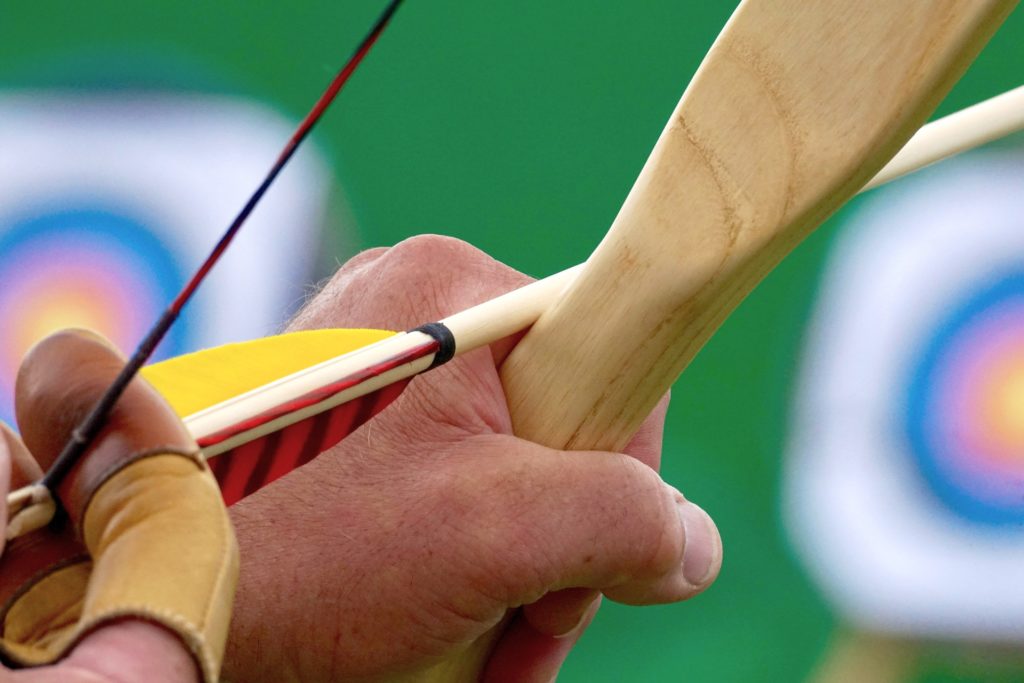
Regardless of what purpose you will be using your bow, you will need to shoot with accuracy. After all, what’s the point of using your bow if you’re not going to hit your targets? One of the best ways to improve your accuracy is with the help of a sight. There are different designs of sights available, with each of them having its own list of advantages and disadvantages. Peep sights are one of the simplest forms of sight, but they are more than adequate if used properly.
What Are Peep Sights?
The peep sight is considered as probably the first aiming device ever made. Used for all kinds of shooting devices ranging from bows to assault rifles, the peep sight helps improve shooting accuracy by enhancing the focus of your eyes. Basically, the peep sight works by improving your eye’s ability to see what’s in front. In other words, it helps your eye to accurately judge its target, resulting into more accurate shooting. The science behind peep sights is that looking through a small gap enhances focus, improving aim and accuracy on the process.
Traditionalists love the peep sight, and they have some distinct advantages over other aiming devices. Here are some of the advantages you can enjoy if you choose to use peep sights for your bow.
- Easy to use – One of the best things about the peep sight is its simplicity. Using this device is easy. All you have to do is focus your eye on the sight and you’ll have a clearer look at your targets. Installation and maintenance are also simple. You won’t need batteries to use this device, and it is not prone to common issues such as fogging. A more detailed look at how to use your peep sight will be discussed at a later part of this article.
- Low price – The peep sight is remarkably inexpensive. With alternative aiming devices such as optics and lasers being quite expensive, it is a relief to know that you can purchase an aiming device at an affordable price. When you consider the accuracy of these devices, the peep sight is the most cost-effective aiming aid you can get for your bows.
- Accurate – Of course, an aiming device is useless if it is not accurate. The peep sight is a time-tested device with remarkable accuracy. In fact, the best peep sights are tested to be accurate in distances of up to 200 meters. This may not seem much, but that is a lot of useful range for most purposes. The peep sight is proof that you don’t need to spend a ton of money to get an accurate and useful aiming device.
How Do They Work?
 You must be wondering how the peep sight works. In the earlier part of this article, we discussed the mechanism behind the function of this sight. While that partially answers the question, you can better appreciate how the device work by actually learning how to use it. Here is a step-by-step guide on how to use your peep sight.
- Find the right-sized peep sight – Size matters when it comes to using peep sights. There are some situations when using a smaller sight is better, and there are also situations when going for a larger sight actually helps you. Basically, going for a sight with a smaller aperture allows for better accuracy and range, as it gives a clearer and more focused view of the target. A small peep sight is better for shooting in broad daylight and situations where obstructions are minimal. In darker environments, a peep sight with a larger aperture is a better choice as it improves low light visibility.
- Properly install the sight – You will also need to learn how to properly install your peep sight. This is because improper installation could lead to inaccurate shooting, and can even damage either your peep sight or your bow. Installation instructions are slightly different for different kinds of bows. A later part of this book will focus on how you can install a peep sight in your bow properly.
- Learn to take aim – One thing about using peep sights is that you actually have to get used to using it. People who are just getting started in using peep sights tend to shoot their targets either too high or too low in the first few tries. It is recommended that you do some practice shots with your bow during the first few times that you’re using a sight. Eventually, you will find your sweet spot when aiming. However, if your aim is still off, you might have to consider adjusting your peep in the string. The peep should also be anchored securely, as even normal use can move it.
Best Peep Sights on the Market Today
-
- G5 Outdoors Meta Pro Peep Hunter Sight
G5 Outdoors has patented a convex interior diameter for this sight. This design helps in maximizing field of view even under low light conditions. This design also helps in providing a perfect circle aim when the peep is tilted. The string groove is likewise designed to be convex, allowing the sight to make contact with the string at a smaller surface area. This significantly reduces string wear, prolonging the lifespan of your bow string. In fact, G5 Outdoors is so confident with their design that their product comes with a “No-cut Guarantee”. Available in different sizes and colors, the G5 Outdoors Meta Pro Peep Hunter Sight is one of the best products of its kind right now.
One thing going for this product is it works, plain and simple. Nearly all people who bought this product loved its accuracy, saying that it significantly helped them improve their aim. Many also like its build quality, noting how sturdy it looks. Another thing going for this product is the number of options available. Aside from being available in 3 different aperture sizes, you can also get this product in 6 different colors. If you are looking for a peep sight that works, then this is the product made exactly for you.
- Radical Archery Designs Super Deuce 38
This peep sight designed by Radical Archery Designs is made for the serious archer. It is built using anodized aluminum for light weight and excellent durability. It is mounted into the string at a 38 degree angle (hence the name) to provide users with a true round aperture at full draw. It has dual radius slotting that removes sharp points that can damage strings. It also has a safety groove that prevents accidental removal during dry fire. Available in different aperture sizes and colors, you can pick the Super Deuce 38 that fits your needs.
The Radical Archery Designs Super Deuce 38 has garnered strong reviews from those who have used it. People like it because it is easy to install and its rounded design protects the string from damage. It is also very accurate if installed properly, resulting to improved shooting almost right away. Perhaps the only downside to using this peep is that it might take some time before you get used to it. Overall, this peep gets the job done and should be able to provide excellent value for your money.
- Precision Peeps Sight
This product by Precision Peeps has a design that is completely different compared to other peep sights available on the market today. It has a unique vertical post found inside the peep. You can use this post as an additional point of reference for aiming. The idea is that instead of lining up 2 different apertures, you can line up the pin at the top of the post, making it easier for you to aim your shots. With this extra point of reference available, you can theoretically improve your shooting accuracy.
The reviews of the Precision Peeps Sight are mostly positive, a testament to the general effectiveness of this unconventional peep sight. The vertical post does its job as advertised. While that alone won’t raise your accuracy, it at least provides an additional point of reference for aiming should you be uncomfortable with traditional aiming. Of course, just like with any unconventional design, it will take some time to get used to it. However, once you get accustomed to its design, it does help with accuracy. Overall, it’s a good-quality product with a different approach.
How to Install a Peep Sight
Learning how to install your peep sight is crucial for maximum accuracy (and therefore maximum enjoyment). The installation process for recurve bows and compound bows are slightly different, but both procedures are not too complicated.
For Recurve Bows:
First, place your bow on its side. The side of the bow where you will place your sight should be facing upward. The sight should be aligned facing the front of your bow. Line up the holes in your sight with the holes found in the riser of your bow. With the help of a screwdriver or an Allen wrench, mount the sight into the bow. Check if your bow is at the right level using a string level. Place the level on the sight until it is accurately aimed. Once done, fully tighten the screws to secure the aim in its place, making sure that the arrow, when placed in your bow, does not come in contact with your sight. Adjust the telescoping frame of the sight to avoid eye strain while shooting.
For Compound Bows:
With the help of a bow press, determine the ideal position to place your peep sight. The ideal position is where you can accurately locate the center of the string. Mount the sight in place with the help of a screwdriver or an Allen wrench. Confirm if the sight is centered by making a practice aim, checking if your eyes are correctly aligned with the sight. Your peep sight should go square with your eye, no matter how many times you try and aim it. Adjust the height of the sight if needed. Once the aim is properly positioned, tie in the sight using the stop knots found at the top and bottom of the peep sight.
Conclusion
 Just to recap everything, the peep sight is a device that helps improve your aim by improving your eye’s focus on its target. While not as advanced as other aiming devices, it is still very useful, thanks to its simple design, affordability, easy usability, and solid accuracy in most shooting conditions. You can choose from different aperture sizes for use in different shooting conditions. Installing a peep sight in a recurve or compound bow is relatively simple. However, if you find it too difficult, you can ask the help of a professional for proper installation.
by Jackson | Apr 19, 2015 | Archery Accessories
Optical accessories are an important addition for any hunter who wants to be successful in the field. Whether you hunt for survival, tradition, sport, or a combination of these; one thing for certain is that you do not hunt to fail! These five must-have optics could determine whether your next hunting adventure is a success.
Five Optic Accessories Every Hunter Must Have.
Binoculars
An essential piece of equipment for any hunter to have is a good pair of binoculars. Game animals blend into their surroundings very well, they are designed to do so. Human eyes have a hard time picking up the slight color differences, particularly in low light conditions encountered during the prime hunting times around dawn and dusk. In fact it is normally movement that we first detect when trying to locate game. There have been many times when I have walked right up to an animal without knowing it was there. If I had seen them sooner, I could have prepared for a shot.
Binoculars give you a much better chance to see animals tucked away in the bushes. Binoculars can also assist your vision in low light conditions that you often encounter when hunting. When it comes to binoculars you need to look for a few things, it is essential that they are waterproof and fog-proof. Without these features you may find yourself in a position where you cannot see through them.
Choose a pair of binoculars with a magnification that fits the areas you hunt in. Normally for bow hunting 10X magnification should be sufficient for most occasions. Another factor to consider is the game you are after and the range or terrain you are hunting in.
Any optical accessory you use in the field must have quality lenses and it is definitely worthwhile to spend that little extra to get the top quality equipment. I recommend sticking with brands known for quality. I prefer either Bushnell or Leupold. The thing I like about these brands is that they focus on optics for hunting. They don’t make anything else.
Finally, you need your binoculars to be easy to use. I prefer binoculars that can be operated with one hand. Consider all of these factors when choosing your next pair of binoculars.
Following is a selection of binoculars that I would recommend.
Bushnell Legend Ultra HD 10x 42mm
– You need to be able to see with great clarity and these rugged binoculars are just the answer. They’re tough, small enough to take with you, and offer great crystal clear vision to help you get an up close look from a distance. You can find them for $200 and up
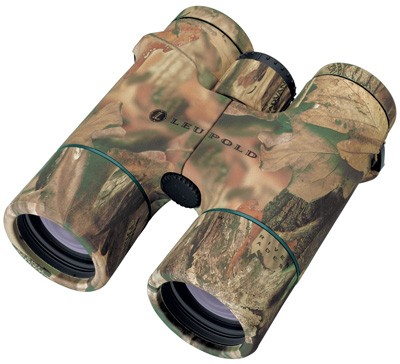
Leupold Mojave Binoculars, 10x42mm, Mossy Oak
These binoculars represent the top of the range style of equipment, being camouflaged, providing a great optical lens and 10x magnification. This is for the more serious hunter priced around $400
Trail Cameras
Have you ever hunted an area wondering if there are any animals around? You’ve noticed tracks and aren’t quite sure what animal they are from? Trail cameras are the answer!
I want my hunting trips to be as successful as possible therefore I will check out an area first before going hunting. The best way to do this is by use of trail cameras. They allow you to see what game is around when and where they are moving, this significantly increases the chances of a successful shoot. Giving you the best opportunity to harvest your next trophy. One of the best advantages you gain by the use of trail cameras, is that you are able to scout out your next hunting trip while still at work and then when going on your hunting trip you are already armed with the essential knowledge you need to bag your prize.
Many hunters use multiple trail cameras. Many use two for one area and have trail cameras in multiple areas. This way they can find the area with the best animals. They get a better idea of where the animals are traveling to and from. They can also figure out where the “big boys” are hanging. When choosing your trail cameras it is important to buy ones with night vision. If it uses flash, it must be infared flash to avoid scaring the game away. I prefer trail cameras that take videos, this will give you the most information about their habits.
When adding trail cameras to your accessories portfolio make sure to choose those with enough memory. You don’t want one that fills up quickly. Choose trail cameras with extended battery life. That way you can set it and forget it. The less disturbance in the area the better. I also recommend using trail cameras with great resolution. I would say 5 MP or better, HD is always preferred. With trail cameras I prefer using Bushnell however the I have included the Browning trail camera as well. I know these brands. They have never failed me!
Following is a selection of trail cameras that I would recommend.
Browning 10MP Game Camera
– This Browning trail camera has an amazing 10MP camera with 100ft infrared flash range and HD video. It currently rates 4.5 stars on Amazon and is currently the smallest high performance trail camera available.
Laser Rangefinders
I love to hunt with a bow. Other than your bow and arrows, a laser rangefinder is probably the most important piece of equipment you can have. Distance affects accuracy in archery tremendously particularly over longer shots in terrain where you are unable to get closer to your target. Laser rangefinders give you the ability to know exactly what the distance to your prey is. Differing terrain can affect your judgement of distance, 30 yards in the brush looks a lot different than 30 yards in the open, particularly in lower light situations.
Before I started using a rangefinder I found I was misjudging the distance and creating inaccuracy in lot of my shots. This was particularly apparent when I first started bow hunting, now I am able to judge the distance much more accurately, however the rangefinder is always correct. When shooting my arrows would be either high or low because I had misjudged the distance, and this was making the difference between a clean kill or just injuring the animal.
I recommend laser rangefinders that are able to make adjustments for elevation, as uneven terrain can make the judgement of distance more difficult. Whether shooting up-hill or down-hill, these will still give you accurate shot readings. This is especially important for bow hunters. A 15 degree difference in elevation could cause you to completely miss a deer, even if your distance was accurate. Choose a rangefinder that does these calculations for you. I also recommend laser rangefinders that are easy to use, one handed operation is preferred. Stick with brands that are known for quality. Again, I prefer either Bushnell or Leupold. In my experience these brands are phenomenal.


Bushnell 4x20mm Bowhunting Laser Rangefinder This rangefinder includes Bushnell’s Clear Shot technology to enable you to determine if you are able to make the shot or not (is there a branch in the way of the flight of the arrow). It also has a bow mode that provides true horizontal distance to the target,and features 4x magnification. This is truly a good rangefinder for the price under $200, however it is only rain proof and not waterproof. The
Bushnell G-Force Rangefinder
is waterproof but costs approximately $400.
Leupold RX-FullDraw Archery Rangefinder
This rangefinder features a bow mode out to 175 yards (not sure if I am that good a shot) and has 5x magnification. It also features a trophy scale that allows you to determine the size of the antlers if you are trophy hunting.
Sights
I am frequently asked “What are the best bow sights for hunting?” In answering this, there are a number of factors to consider, I believe good sights are a necessary accessory for every bow hunter and again there is no substitute for quality. There is currently a vast array of sights available for the archer, and across the range of bows whether compound or recurve bows. A lot of the input into this decision of what sight is best for you depends on where and how you hunt, however I would go for a more rugged construction rather than a cheaper plastic version that may not stand up the knocks it will get whilst hunting.
I normally recommend a 5 pin sight for the compound bow hunter, this allows you to aim accurately over varying distances and the ability to quickly adjust your shooting range. However, there are now fully adjustable single pin sights as well the allow you to shoot over varying distances. Some hunters love these and some hate having to adjust their sight every time they go to take a shot and the extra time it takes. Additionally I look for sights that have some sort of light source for low light situations.

Field Logic IQ 5 Pin Sight
Field Logic IQ 5 Pin Sight
This comes in RH and LH model has tight stack fibre optic pins and is adjustable in a 2nd axis. It also comes with a money back guarantee to shoot tighter groups or your money back.
HHA Optimizer Lite Sight – OL-3019 RH
This is regarded as one of the best single pin sights in the bowhunting world. This just needs sighting over 20 and 60 yard ranges and then you are ready to shoot 20 to 80 yards in 5 yard increments. Excellent value under $100.
Cameras
Of all the accessories that I recommend, this is the least critical but the most fun. Whether you have been hunting, camping, fishing, or hiking; I bet there have been times when you wished you had footage from your expedition. Maybe you missed taking a picture of an animal? Maybe you missed recording your kids doing something funny? Or did you wish you had recorded your hunt because it was so incredible? I know I have been there before.
Granted, cameras will not add to your success when hunting. They may even distract you a bit. But I tell you what. They can make your trips a whole lot of fun! Any time I take a trip outdoors I take my compact camera. I have recorded some pretty cool things and even funnier things when hunting. The thing is, a camera will not help you bag a trophy, but it will help you with bragging rights with your mates in the bar or to remember that trophy vividly for the rest of your life. It will also allow you to share that experience with the family on your return from your trip. And isn’t that what the outdoors is all about? Sharing it with the ones you love? I don’t regret putting a camera into my accessory arsenal. You will not regret it either.
Now available are a range of mounts for smartphones, Go Pros and the like but there are also specialized cameras the can mount directly to your bow as well.
Prepare Now
No matter what time of the year it is, it is never too early to start preparing for next season. The earlier you buy your new accessories the better, this will allow you to become comfortable using them. The last thing you want is to have that trophy of a lifetime in front of you and you are stuck fumbling around with equipment that you are not familiar with. Use your optics often! Make sure that they are still working properly.
You can use your trail cameras year-round to scout the animals you intend to hunt. The more you learn about your quarry the better equipped you will be on your next hunting trip
Happy hunting!

by Jackson | Jan 5, 2015 | Archery Accessories
I’m pretty self-sufficient when it comes to taking care of my equipment, but sometimes you don’t have the right tools or even know where to go. Here are a few archery tools that you need to have to make sure that you can take care of your bow yourself. Any of these will help a bit, but all of them together will give you the ability to take complete care of your own equipment and fine tune it to your needs.
I’m not mentioning all the little parts that you might need with these tools. I’m focusing on the main tool that will do most of the work. For example, you’ll need to get glue and vanes to fix your arrow, but it will be a waste of money if you don’t make sure to buy the fletching jig to install them.
The archery tools
Please click on the pictures to see the reviews of them at Amazon.
The Real Avid Bowsmith Multi-tool is an excellent all in one that takes care of a majority of your gear needs. It has 28 different functions built-in that will take care of prepping arrows to be fixed, installing nocks, to sharpening broadheads. You’ll find that you can do a lot with this one tool. Priced around $40, it’s worth every penny for its usefulness.
The Martin Bowmaster bow press is the tool that you use to make any and all string, cam, or tension adjustments on your bow. This is a really handy version that you can take with you if you need to make a repair while your out in the field. Priced around $47 to 55, it’s a super value for all your needs.
The Arizona Rim Country arrow fletching jig is a very easy to use and works great for fletching all the vanes on your arrow at one time. This makes fixing an arrow extremely easy and eliminates most problems involved with fixing your own arrows. Be sure to get the fletching jig that matches what you want on your arrows. There is right helical, left helical, and straight. Priced around $50, you’ll save tons of money fixing your own arrows.
This Carbon Express pro bow square helps you to line up your arrows on the bowstring. You can then place a nock in the right spot and you’ll consistently get higher quality shots than you would by just placing the arrow in a random spot each time. A very simple and extremely useful tool. Priced around $12, it makes life easier for a low price.
The BCY Bearpaw serving tool makes installing a serving on your bowstring very easy. It’s much better than the Bohning red tool in my opinion. The rollers and adjustable tension make it easy to have a secure serving protecting your bowstring from wear and tear. Priced around $29, it will save you lots of money on replacing bowstrings.
All of these tools are very important in taking care of your own equipment. Each one will need to be used in conjunction with the right parts so be sure to pay attention to that. For example, if you buy the serving tool, then you will also need to buy serving thread to use on the serving tool. I hope this helps you figure out what archery tools you’ll need to take care of your equipment.
I wish you the best of luck and hope you get to go shoot more often.

by Jackson | Dec 1, 2014 | Archery Accessories
Finding the right archery gift can be challenging at times. Many people might not have a clue on what to buy or get that would be a nice and thoughtful gift for avid archer. I’d love to help you out by sharing some small easy gift ideas that can let someone know that you care and that you’ve spent time and effort choosing the right gift for them.
Archery Gifts to check out
Bushnell H2O 10×42 Waterproof/Fogproof Binocular w/Roof Prism – You need to be able to see with great clarity and these rugged binoculars are just the answer. They’re tough, small enough to take with you, and the two different models will offer great crystal clear vision to help you get an up close look from a distance. You can find them for $75 and up

Real Avid Bowsmith Archery Multitool (Red/Silver) – The multi tool is an essential tool for a compact and easily carried tool that you can take with you so that you’ll have all the things you might need to work on your bow when you’re away from home or out in the field. The real avid bow smith is around $35.

The Bone Collector 400 F.P.S. Target by Morrell – This is a top of the line archery block target. An archery can always use another target to go practice on. This one can handle pretty much anything you can throw at it. It’s able to handle bow speeds up to 400 fps which is higher than many compound bows. It’s a great gift for about $55.

BERRICLE Sterling Silver AAA Cubic Zirconia CZ Bow and Arrow Women Fashion Pendant Necklace – This sterling silver necklace makes a great gift. It’s made with sterling silver and cubic zirconium stones that make it look like a professional work of art. An excellent gift that can have different meanings for the one that you care about. Priced around $45.

Garmin GPSMAP 64 Worldwide with High-Sensitivity GPS and GLONASS Receiver – This handheld GPS device can make being out in nature a better experience. You can load different maps and use the tracking feature to make sure that you know exactly where you’ve been and how to get back. The 64 also boasts an increased memory from earlier models. Priced at $250 and up depending on what you want.

Smith & Wesson Galaxy 13 LED Flashlight (10 White LED & 3 Red LED) – Be able to see where you are with this bright flashlight from Smith and Wesson. It has 10 white LEDs and 3 Red so you can see brightly or in low light situations. The flashlight is made for a battery life of up to 60 hrs. The metal housing protects the flashlight and keeps it working when you need it. Priced around $30.

Outdoor Edge Game Processor PR-1 12-Piece Portable Butcher Kit with Hard Side Carry Case – For the hunter out there. Being able to deal with an animal after it’s been harvested is extremely important. This 12 piece set will give you everything you’ll need to process the animal as efficiently and effectively as possible. The knives are made of hardened stainless steel and a rubberized handle keeps you grip secure. Priced around $60.

The Traditional Bowyer’s Bible, Volume 1 – For the traditional archery fan or anyone looking to build a traditional bow, this is the book to get. There are 3 books in the set and all three are extremely good, but the first book is the one not to miss out on. There’s a lot of information, how to, and history in this book and you can look at the series if you want even more information. Priced around $15 for just this book and around $55 for all three together.

Stealth Cam G42 No-Glo Trail Game Camera STC-G42NG – This game camera gives you great 10 megapixel shots and uses a “black infared” system that keeps your game camera stealthy and able to be triggered from up to 100 ft depending on the configuration. You can use the burst mode to get multiple shots at a time or have video be triggered to record in HD instead. Priced near $130.

Coffey Marketing Gorillagrip Arrow Puller – The best stocking stuffer for anyone who shoots arrows. You’ll find that many arrows get stuck in target and it takes a little extra help to get them out. This arrow puller is the answer for you. It makes it very easy to grip the arrow and holds onto the arrow very well. It’s made of natural rubber and is priced around $9.

As a courtesy to help you find the best archery gifts for you during these holidays, I’ve provided links that go to Amazon for each product so that you can look at all the reviews and decide which item will work best for your needs. I do hope that these have been helpful and give you some good ideas.
photo credit
by Jackson | Apr 7, 2014 | Archery Accessories
You can have a lot more fun when you get to add some variety to your shooting targets. When I started shooting at my house, I had The Block to shoot at. That was great and I was very happy and only shooting for a short time every couple of days. The excitement of shooting for the same diamond most times wore off after a couple of months and even shooting at the deer vitals on the other side was helpful, but it wasn’t enough.

Printable targets
Then I found printable targets
I wasn’t too sure about the idea of printable targets when I first heard of them, but I thought I’d take a look anyways. I’ve always been a bit skeptical so it’s just my nature. So I took a look and ever since then, I’ve actually been pretty sold on them. I need variety in what I shoot and that’s part of the reason I love 3D shooting courses. You can’t always have your own 3d shooting course so having different targets to shoot at comes in right after that.
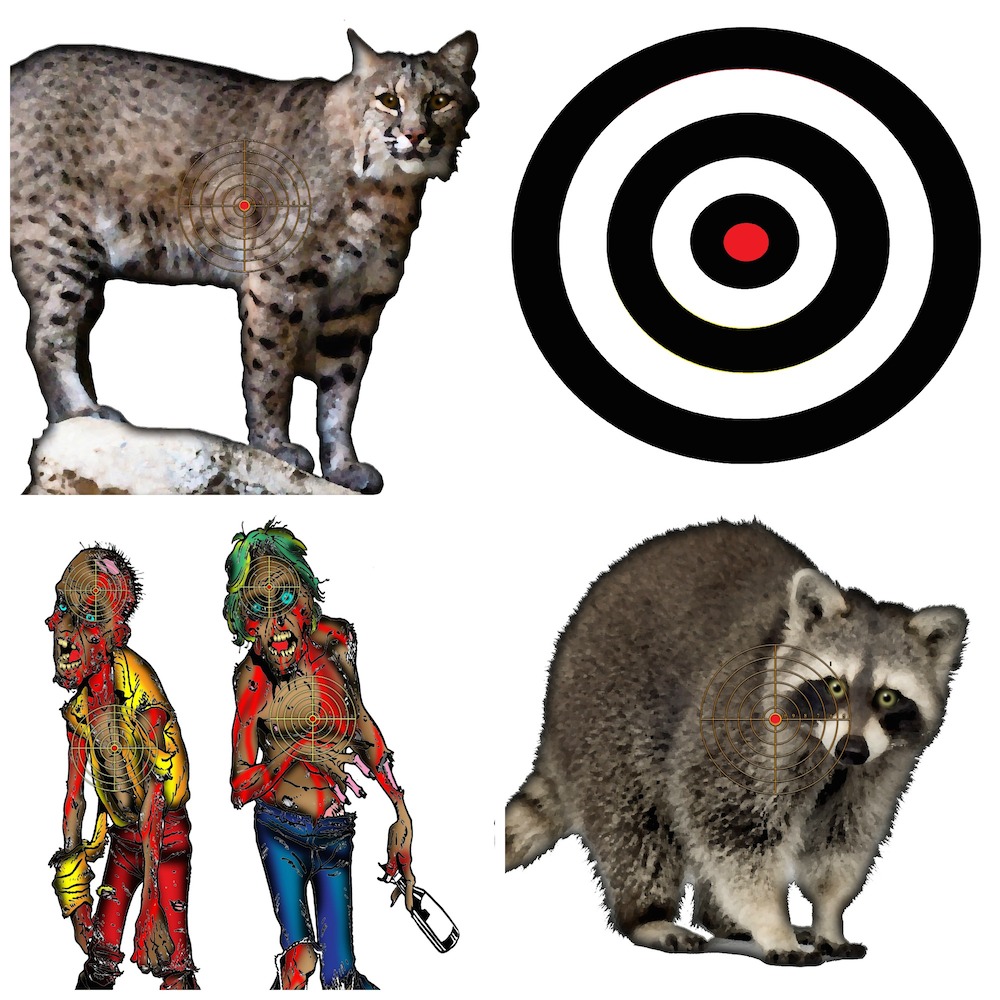
40 Pack Animal Printable Targets
I like hunting and I needed to practice, but all I had was a block target and my backyard. These printable targets where just the ticket for getting to feel like I was hunting and being able to practice at the same time. You get 10 game animal hunting targets that are each on one page. Then, you get the same 10 animal targets that are blown up images and can be printed off on multiple pages. It’s a great way to practice on a different shooting target while having fun. Priced at $3, you’ll be paying a few pennies per target after the first printing.
How about shooting zombies?
The other cool thing about printable targets is that you don’t have to just shoot a circle or a deer. You can get creative and have a lot more things to shoot. Take zombies for instance. With the zombie craze going on, you might as well practice shooting zombies. You’ll have a lot of fun shooting at them instead of a circle or square.
20 Pack Zombie Shooting Targets
These zombies are a lot of fun to shoot. You get to shoot them on single pages or you can print off the large image on multiple pages to make them more life-like. Priced at $3, they’re a great deal of fun since you can print them off for years to come.
Buy the 70 Pack Animal and Zombie Target Combo for only $5
So, my thoughts on printable targets is that they are very useful when you need variety, get bored easily, or need cheap targets. There’s really nothing that fits that bill besides these.

by Jackson | Apr 1, 2014 | Archery Accessories
Everytime I hear people talking about different archery accessories, you’ll end up talking about using lighted nocks. Just to be sure you know, a nock is the fitting on the back-end of the arrow that the string goes into. These definitely sound cool the first time that you hear about them. Seriously, who wouldn’t want to put a light on their arrow?
Reasons to use lighted nocks
The main reason to use a lighted nock is for finding your arrow. Lighted nocks help you out by making it a lot easier to find your arrow. Lighted nocks normally come in several different colors in a 3 pack. I prefer the blue just because it’s a lot easier for me to see.
Lighted nocks are also great for training by helping you to visualize arrow trajectory. If you think your arrows shoot flat, arc too much, or wiggle excessively, then you should try using lighted nocks.
Checking shot placement. There are many people who have used lighted nocks when hunting to help make sure you made a good shot and to aid in finding the animal afterwards. I haven’t used them during hunting, but I know several who have used them successfully.
Nockturnal-X 3-pack Red – These are some really great ones to use. The red color works really well and these will stay on for a long time. Just be sure to have a pocket knife or something to turn them on or off. Priced around $25 for a pack of 3 on Amazon.
Tips on using your lighted nocks
Keep them out of your arrows. Sounds weird, but these are a bit more expensive than regular nocks so you don’t want to lose them. Keep them out of your arrows until your ready to use them. That way if you lose an arrow, you won’t accidentally lose a lighted nock.
Turn them off after you’re done using them. This is a common sense thing, but it really makes them last a long longer if you take the time to keep them turned off while you’re now using them.
Get replacement batteries. These use little batteries and they’re not that expensive to replace so go ahead and get a replacement pack when you get the lighted nocks. This way, you’ll be ready to replace them when you’re out in the field if they go out.
Lumenok GT Nock (3-Pack), Green – Check out these green lighted nocks on Amazon. These are another pretty good choice when you’re looking to try some out. Just be sure that they are the right size for your arrows. Priced around $20-25 for a pack of 3 on Amazon.


