by Jackson | May 9, 2015 | Archery Education
Introduction to Instinctive Archery
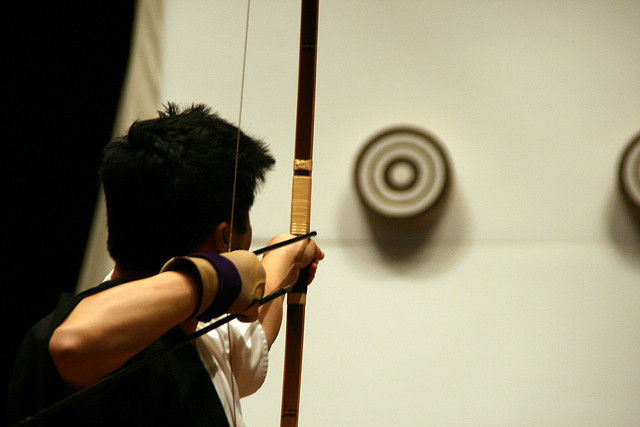
Originally bows and arrows were created and fashioned out of natural wood. Shooting an arrow was done by simply drawing back the bow with the string, taking a general aim, then letting it loose. There was no additional equipment, only instincts and an inner sense guiding the person. Today, this is known as instinctive archery. In this article the basics of instinctive archery will be explained – the equipment required, and the best natural stance to assume when shooting instinctively to improve your aim.
Some people are born with natural gifts and talents in sports such as archery and many others. This becomes evident when they first pick up a bow, an arrow, then shoot with remarkable precision on their first attempt. Others who are less gifted will need to traverse the well-worn road of practice to achieve excellence.
The instinctive archery aspect is much like how we throw a baseball at the exact spot where we want it, or a stone to hit a target- it is completely natural, and follows the bodies’ internal compass, plus the essential mind and muscle coordination to make it happen. Instinctive archery, or “snap-shooting”, was adapted for more practical reasons other than sport. It was used mainly for hunting food and game, where little time and concentration is given, before the target runs away. Emphasis in instinctive archery is placed more on the archer’s skill rather than the use of sights or a prolonged aim and is completed more by feel.
As with any new skill, the most important part of mastering it, is the need to practice, which trains the brain and the muscles involved and thereby increases the chance of an precise and accurate shot. With sufficient practice this new way of shooting will become second nature or natural for you. In order to find success with this new shooting style, you must prepare, so for more information read on below.
A Guide To Instinctive Archery Basics
First off you require a solid starting point for instinctive archery and this starts with a properly placed arrow rest and nocking point to serve as a solid guide. It can be adjusted as you become more comfortable with style of shooting. You will find different nock points based on the type of bow you may be using, such as a longbow or a recurve bow. Use the same equipment each time when learning, doing this will eliminate any inconsistencies with your equipment whilst practicing.
Next you require a consistent form to create a solid base on which to build. The goal in this exercise is to recreate the correct pose and shooting motion each time, much like basketball players perfecting their shot motion or golfers, their swing.
The key to creating this form is your stance, draw and anchor, and finally the release. We need to start from the correct position, a nice smooth draw remaining balanced and then holding at your anchor point. I use my fingers just touching the corner of my mouth as my reference, however, there are a lot of variations from this common point. What is essential is that you come to exactly the same point each time. By maintaining the same stance and utilizing the same draw each time induces consistency. Consistency is particularly important when learning any new skill such as this, do the basics well and everything else looks after itself.
Starting with a stance that puts your feet about shoulder width apart, ideally with your toes pointing at 90 degrees to your target and the balls of your feet aligned with the aiming point. With your weight slightly more onto your front foot so your weight is going in the direction of your shot. The bow is normally gripped by the non-dominant hand and allows the pointer finger to do its job of pointing directly to the target when you raise the bow. Keep in mind that different bow types have features that make it easier to grip, and you might be unaccustomed to this kind of grip before, but with practice it becomes second nature. The most natural and intuitive way to become better at instinctive archery is to always keep your wrist, arm and pointer finger in alignment- in this manner, you should experience less problems and become more accurate more quickly.
Now nock an arrow just underneath your nocking point. It should rest on the same side as the back of your hand that is gripping the bow. ‘Gripping the bow’ is a bit of a misnomer, in so much as the bow isn’t actually gripped but rests (or pulled back) against the palm of your bow hand as the arrow is drawn. Consider slightly tilting your bow to where the arrow cannot fall off, and remains in position even when you shift. Hold the string with your dominant hand with a traditional grip. Generally, the pointer, middle and the ring fingers are utilized in holding the string. The bow’s string should be handled with the fingertips’ meaty pads between the tip of the finger and the finger’s first joint. If you find that it is too hard to draw the bow in this manner, choose a lighter bow until you can draw without too much trouble. I recommend that you also protect your fingers over a long practice session with a finger tab or shooting gloves. For my review of the best archery gloves click here. Your string hand should maintain a straight line just behind the arrow, from the fingertips to the wrist and extending to the elbow. The arm should look like a natural extension of the arrow. The bow itself is drawn not one-sided, but use a combination of pulling with the dominant arm that grips the string and pushing with arm that holds the bow.
A fully drawn bow needs an anchor point to get to the next step. Finding and establishing a good anchor point is also one of the most important technique in learning instinctive archery because it allows you to consistently maintain a draw length where you are able to comfortably position the arrow aiming towards the target. The most recommended anchor point is where the string is drawn back to where the middle finger ends and touches the corner of the mouth. This position is the most common and most reliable anchor point, so use it well and often.
Release the arrow by relaxing the back of the hand, optimally about the time the finger comes in contact with the anchor point. An excellent release would be where the draw hand is exactly where it was before and after the shot was made.
The real skill in following the instinctive archery path is the ability to focus on the target and nothing else. Instinctive archery is all about skill and focusing intently on the target and forgetting about everything else in the moment. To achieve this start focusing on the target intently even before the bow is drawn.Once you have your focus solely on the target, then and only then should you commence the draw.
It is essential that the bow is not held at full draw for long – fight the urge to carefully aim and just use your gut instincts.
Keep the focus and fine-tune your form to whichever works for you in the long run.
I recommend starting over a short distance say up to 7 yards. It serves no purpose trying to much your first shots instinctively over 30 yards and miss the target every time. Start from a short distance initially and then work back as your skill improves. This is a much more rewarding way of commencing this skill and ensures that you are more likely to continue as your skill improves.
To learn how to increase your accuracy click here.
Remember that instinctive archery is skill-based and you will benefit tremendously with time and practice. Don’t fret too much if the starting shots were not to good – focus and it will get better.
by Jackson | Apr 25, 2015 | Hunting Tips
A Beginners’ Guide to Bow Hunting
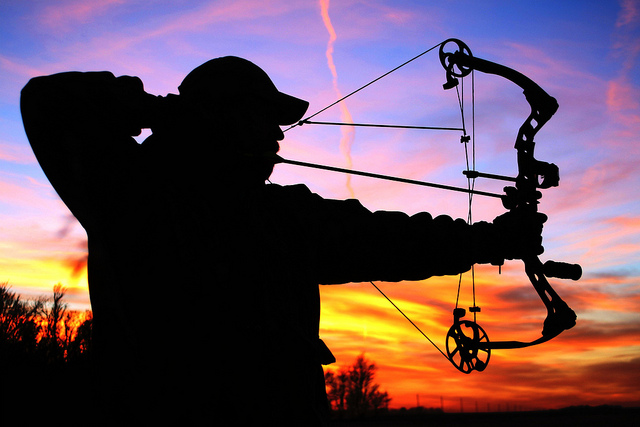
Bow hunting and archery are some of the greatest passions you can ever have in life. In fact, bow hunting is one of the fastest growing sections of the hunting industry. The challenge of successful bow hunts is unparalleled in the world of sports, and the reward that comes with a successful hunt is one that you’ll live to cherish forever. Bow hunting presents far more challenges than hunting with a gun, however, this means that it is so much more rewarding.
One of the advantages of bow hunting is that you get an earlier start to the season, that gets you out in the woods earlier . These are usually some of the prettiest times in one’s life, given that the weather is reasonably warm and the leaves are turning during bow hunting seasons.
Several states have opened their bow hunting seasons to crossbows, although there are usually some age restrictions. As a beginner, you may be tempted into following the easy route of hunting using a crossbow instead of learning to shoot a traditional or compound bow, given that the use of crossbows require little skill. As always you need to abide by the relevant by-laws covering bow hunting.
Bows for hunting
Using a bow as your weapon of choice when hunting, provides for much more satisfaction and enjoyment when successful in bagging your prize. This is because the skill level of the hunter needs to be so much greater than when using a gun. This is mainly because of the range of the weapons used and their accuracy over the normal distances that hunting occurs. Learning to shoot with a traditional or compound bows opens up numerous hunting possibilities, some of which are denied to those who make use of a crossbow only.
The compound bow, for instance, allows you to shoot accurately enough to hunt within a matter of some few weeks. However, the more practice you have and the more proficient with the bow you are will greatly improve your accuracy when taking that all important ‘kill shot’. The best part about modern bows is that you don’t have to train and practice for months on end in order to become sufficiently proficient in hunting with a bow, again some practice in the off season remains important to maintain your skills. This is where 3D shoots or even practice down at the range becomes very handy. As with all new skills, practice is always the key to top notch performance. And even though you may find that you are shooting quite well most of the time at the very beginning, you’ll have to make it a habit to shoot consistently well and to shoot well under pressure is all important. This provides the consistency that is necessary to harvest game more regularly and humanely.
Before making the commitment to learning bow hunting, it would be best to know what you are actually getting into. Here are some bow hunting basics you ought to know as you pursue to acquire and sharpen your skills.
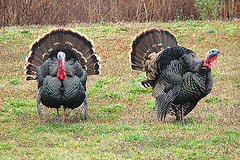
Wild turkey toms: photo by Vicki DeLoach
Bow Hunting Basics
There are three main types of skills you’ll have to develop as a bow hunter. They bear a high degree of importance and will help you in becoming a great bow hunter. They are as described below:
Before the shot– In order to acquire the opportunity to even take a shot, you’ll have to get close enough to your target and remain undetected. You should ascertain that you’re in a position where you can get a clean, unobstructed shot. A high level of accuracy, in terms of range estimation, is required. You should make sure to train to consistently and accurately judge the range. You can opt to make use of a laser rangefinder to help you in getting accurate shots. To read more about laser rangefinders click here.
Making the shot– Developing a good technique of shooting is the key to success, regardless of the range distance. Click here for techniques and tips on how to improve your accuracy. Regular and quality practice will certainly enable you to develop an appropriate technique. One single shot executed with solid technique is worth more than a hundred bad shots. So when practicing it is important that you view each shot as if you were actually hunting. Also it is good to practice beyond your own maximum range and focus on using the correct technique at all times. Longer shots will make shorter shots seem much easier.
After the shot– This welcomes you to another new aspect known as blood trailing. Making the shot accurately does not end the experience of bow hunting. Whilst we want every shot to result in a clean kill, unfortunately that is not always the case, sometimes there is a need to be able to track the animal. This process starts with blood trailing which involves observing the blood on the arrow to enable you determine the part of anatomy you’ve hit. Different colors will mean different organs. Getting knowledge on blood trailing helps you hone your hunting skills as you broaden your hunting opportunities.
Selecting a Bow
Majority of bow hunters make use of compound bows since they offer an extensive list of benefits, making them superior to other designs. They utilize a series of pulleys to create what is known as ‘let-off’. As you draw the string way back, the weight will let off, allowing you to hold the bow a lot longer at full draw, most compound bows have a let-off of around 70%.
Bow Hunting by Kansas Tourism
The other types of bows, namely the longbows and re-curve bows, offer faster target acquisition and snap shooting. However, they don’t have let-off and may be less accurate at longer distances, requiring you to practice even more in order to master.
The most appropriate bow for you would be one that fits, having the right draw weight and draw length. If using a release aid, ensure to have it handy when testing the draw length. You should avoid getting too hung up on the many brands available and instead choose according to your preferences.
To read more on choosing your bow click here. You can also check out our reviews of various bows and equipment that we have carried out.
Tips for New Bow Hunters
Now that you’re rigged and ready, it’s important to get off with your shooting form on the right foot. Below are some tips for new bow hunters that will prove handy as you seek to sharpen your hunting skills.
Relax– you should learn to relax all muscles that are not required in holding the string back fully to ensure that your sight stands the best chance of settling on your target and isn’t jumping around.
Focus on your follow-through – Keep the bow intact in the aiming position till the arrow hits the target. You may not be able to do it entirely, but the mere effort of trying helps keep you on your target better, maintaining a more consistent follow-through.
Finding a good trail– You should keep it simple when hunting. You can find a good trail between a bedding and feeding area which is in a location you know you can get to and from without being detected.
Know your effective kill range (EKR) – This is the magical distance that you are sure to hit your target even under extreme pressure. This distance varies from individual to individual. It is thus up to you to find out what your EKR is. Once you limit yourself to this distance, you’ll be ultimately confident to always succeed.
How to Improve Your Bow Hunting Success
As a bow hunter, you’ll always feel challenged to bring your A-game. Lots of things will tend to cross your mind as you anchor and aim an arrow. Most of such things will be right. Some may be perfect. This one split-second culminates months of preparation, practice and planning. Here are some things you should take into consideration. With them, you’ll know be able to know how to improve your bow hunting success.
Accuracy is paramount– This is the aspect that matters most. Not the given bow’s accuracy, but your accuracy with a certain bow. The first trick to this is finding a bow that you can shoot accurately with, and then shooting it until you’re perfect. You should not even think of giving up accuracy for speed.
Speed– Once you’re able to shoot accurately, you’ll find that a faster bow bears several major benefits. One of them is that you’ll now enormously simplify things in the field. It also grants you the ability to shoot a heavy arrow sporting a heavy head without giving up a lot in trajectory. This guarantees more momentum and better penetration.
Accessories– It is much easier to accessorize for accuracy if need be. The right accessories will improve your shooting regardless of your skill level. The choice of accessories you get to pick depends solely on your preferences.
Proper stand placement– Every bow hunter ought to be aware of the basics involved in choosing a stand site. Placing your stand directly on trails or over scrapes is not always advisable. As you seek to select a proper stand site, make sure to check for secondary, paralleling trails.
Training to make better shots– Bow hunting requires proper planning and hard work in order to execute accurately. However, all these may be futile if your body can’t handle the ultimate test of accurately shooting your bow. You should tune your body to properly shoot a bow.
Final Note
Tradition is the biggest part of this sport. Every time you are in the field with a bow, you are taking time, money, effort and the mystique years of archery evolution has given us. On the field, you get to represent what many would consider to be the purest form of hunting. It is imperative that you take the above points into consideration, especially if you’re hoping for success in bow hunting.
If you want to learn more on either the basics of bow hunting click here, or even check out our reviews on archery and hunting equipment
I hope you have found some useful information from this beginners guide to bow hunting.
Happy hunting
by Jackson | Apr 19, 2015 | Archery Accessories
Optical accessories are an important addition for any hunter who wants to be successful in the field. Whether you hunt for survival, tradition, sport, or a combination of these; one thing for certain is that you do not hunt to fail! These five must-have optics could determine whether your next hunting adventure is a success.
Five Optic Accessories Every Hunter Must Have.
Binoculars
An essential piece of equipment for any hunter to have is a good pair of binoculars. Game animals blend into their surroundings very well, they are designed to do so. Human eyes have a hard time picking up the slight color differences, particularly in low light conditions encountered during the prime hunting times around dawn and dusk. In fact it is normally movement that we first detect when trying to locate game. There have been many times when I have walked right up to an animal without knowing it was there. If I had seen them sooner, I could have prepared for a shot.
Binoculars give you a much better chance to see animals tucked away in the bushes. Binoculars can also assist your vision in low light conditions that you often encounter when hunting. When it comes to binoculars you need to look for a few things, it is essential that they are waterproof and fog-proof. Without these features you may find yourself in a position where you cannot see through them.
Choose a pair of binoculars with a magnification that fits the areas you hunt in. Normally for bow hunting 10X magnification should be sufficient for most occasions. Another factor to consider is the game you are after and the range or terrain you are hunting in.
Any optical accessory you use in the field must have quality lenses and it is definitely worthwhile to spend that little extra to get the top quality equipment. I recommend sticking with brands known for quality. I prefer either Bushnell or Leupold. The thing I like about these brands is that they focus on optics for hunting. They don’t make anything else.
Finally, you need your binoculars to be easy to use. I prefer binoculars that can be operated with one hand. Consider all of these factors when choosing your next pair of binoculars.
Following is a selection of binoculars that I would recommend.
Bushnell Legend Ultra HD 10x 42mm
– You need to be able to see with great clarity and these rugged binoculars are just the answer. They’re tough, small enough to take with you, and offer great crystal clear vision to help you get an up close look from a distance. You can find them for $200 and up
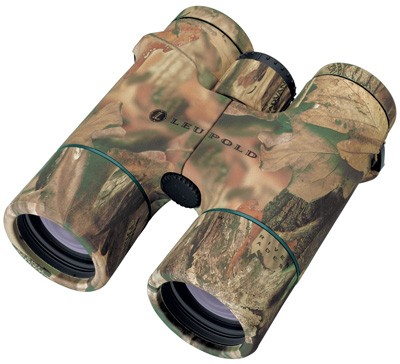
Leupold Mojave Binoculars, 10x42mm, Mossy Oak
These binoculars represent the top of the range style of equipment, being camouflaged, providing a great optical lens and 10x magnification. This is for the more serious hunter priced around $400
Trail Cameras
Have you ever hunted an area wondering if there are any animals around? You’ve noticed tracks and aren’t quite sure what animal they are from? Trail cameras are the answer!
I want my hunting trips to be as successful as possible therefore I will check out an area first before going hunting. The best way to do this is by use of trail cameras. They allow you to see what game is around when and where they are moving, this significantly increases the chances of a successful shoot. Giving you the best opportunity to harvest your next trophy. One of the best advantages you gain by the use of trail cameras, is that you are able to scout out your next hunting trip while still at work and then when going on your hunting trip you are already armed with the essential knowledge you need to bag your prize.
Many hunters use multiple trail cameras. Many use two for one area and have trail cameras in multiple areas. This way they can find the area with the best animals. They get a better idea of where the animals are traveling to and from. They can also figure out where the “big boys” are hanging. When choosing your trail cameras it is important to buy ones with night vision. If it uses flash, it must be infared flash to avoid scaring the game away. I prefer trail cameras that take videos, this will give you the most information about their habits.
When adding trail cameras to your accessories portfolio make sure to choose those with enough memory. You don’t want one that fills up quickly. Choose trail cameras with extended battery life. That way you can set it and forget it. The less disturbance in the area the better. I also recommend using trail cameras with great resolution. I would say 5 MP or better, HD is always preferred. With trail cameras I prefer using Bushnell however the I have included the Browning trail camera as well. I know these brands. They have never failed me!
Following is a selection of trail cameras that I would recommend.
Browning 10MP Game Camera
– This Browning trail camera has an amazing 10MP camera with 100ft infrared flash range and HD video. It currently rates 4.5 stars on Amazon and is currently the smallest high performance trail camera available.
Laser Rangefinders
I love to hunt with a bow. Other than your bow and arrows, a laser rangefinder is probably the most important piece of equipment you can have. Distance affects accuracy in archery tremendously particularly over longer shots in terrain where you are unable to get closer to your target. Laser rangefinders give you the ability to know exactly what the distance to your prey is. Differing terrain can affect your judgement of distance, 30 yards in the brush looks a lot different than 30 yards in the open, particularly in lower light situations.
Before I started using a rangefinder I found I was misjudging the distance and creating inaccuracy in lot of my shots. This was particularly apparent when I first started bow hunting, now I am able to judge the distance much more accurately, however the rangefinder is always correct. When shooting my arrows would be either high or low because I had misjudged the distance, and this was making the difference between a clean kill or just injuring the animal.
I recommend laser rangefinders that are able to make adjustments for elevation, as uneven terrain can make the judgement of distance more difficult. Whether shooting up-hill or down-hill, these will still give you accurate shot readings. This is especially important for bow hunters. A 15 degree difference in elevation could cause you to completely miss a deer, even if your distance was accurate. Choose a rangefinder that does these calculations for you. I also recommend laser rangefinders that are easy to use, one handed operation is preferred. Stick with brands that are known for quality. Again, I prefer either Bushnell or Leupold. In my experience these brands are phenomenal.


Bushnell 4x20mm Bowhunting Laser Rangefinder
This rangefinder includes Bushnell’s Clear Shot technology to enable you to determine if you are able to make the shot or not (is there a branch in the way of the flight of the arrow). It also has a bow mode that provides true horizontal distance to the target,and features 4x magnification. This is truly a good rangefinder for the price under $200, however it is only rain proof and not waterproof. The
Bushnell G-Force Rangefinder
is waterproof but costs approximately $400.
Leupold RX-FullDraw Archery Rangefinder
This rangefinder features a bow mode out to 175 yards (not sure if I am that good a shot) and has 5x magnification. It also features a trophy scale that allows you to determine the size of the antlers if you are trophy hunting.
Sights
I am frequently asked “What are the best bow sights for hunting?” In answering this, there are a number of factors to consider, I believe good sights are a necessary accessory for every bow hunter and again there is no substitute for quality. There is currently a vast array of sights available for the archer, and across the range of bows whether compound or recurve bows. A lot of the input into this decision of what sight is best for you depends on where and how you hunt, however I would go for a more rugged construction rather than a cheaper plastic version that may not stand up the knocks it will get whilst hunting.
I normally recommend a 5 pin sight for the compound bow hunter, this allows you to aim accurately over varying distances and the ability to quickly adjust your shooting range. However, there are now fully adjustable single pin sights as well the allow you to shoot over varying distances. Some hunters love these and some hate having to adjust their sight every time they go to take a shot and the extra time it takes. Additionally I look for sights that have some sort of light source for low light situations.
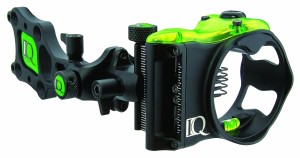
Field Logic IQ 5 Pin Sight
Field Logic IQ 5 Pin Sight
This comes in RH and LH model has tight stack fibre optic pins and is adjustable in a 2nd axis. It also comes with a money back guarantee to shoot tighter groups or your money back.
HHA Optimizer Lite Sight – OL-3019 RH
This is regarded as one of the best single pin sights in the bowhunting world. This just needs sighting over 20 and 60 yard ranges and then you are ready to shoot 20 to 80 yards in 5 yard increments. Excellent value under $100.
Cameras
Of all the accessories that I recommend, this is the least critical but the most fun. Whether you have been hunting, camping, fishing, or hiking; I bet there have been times when you wished you had footage from your expedition. Maybe you missed taking a picture of an animal? Maybe you missed recording your kids doing something funny? Or did you wish you had recorded your hunt because it was so incredible? I know I have been there before.
Granted, cameras will not add to your success when hunting. They may even distract you a bit. But I tell you what. They can make your trips a whole lot of fun! Any time I take a trip outdoors I take my compact camera. I have recorded some pretty cool things and even funnier things when hunting. The thing is, a camera will not help you bag a trophy, but it will help you with bragging rights with your mates in the bar or to remember that trophy vividly for the rest of your life. It will also allow you to share that experience with the family on your return from your trip. And isn’t that what the outdoors is all about? Sharing it with the ones you love? I don’t regret putting a camera into my accessory arsenal. You will not regret it either.
Now available are a range of mounts for smartphones, Go Pros and the like but there are also specialized cameras the can mount directly to your bow as well.
Prepare Now
No matter what time of the year it is, it is never too early to start preparing for next season. The earlier you buy your new accessories the better, this will allow you to become comfortable using them. The last thing you want is to have that trophy of a lifetime in front of you and you are stuck fumbling around with equipment that you are not familiar with. Use your optics often! Make sure that they are still working properly.
You can use your trail cameras year-round to scout the animals you intend to hunt. The more you learn about your quarry the better equipped you will be on your next hunting trip
Happy hunting!
by Jackson | Mar 21, 2015 | Archery Education
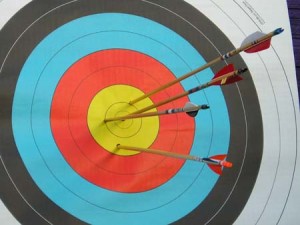
I hate missing, and I sure hate missing by a long shot. It’s really not that cool and it makes me feel dumb. Getting better at your accuracy and consistently being able to hit your target is a HUGE deal and you shouldn’t ignore it. Let me point out that I lost a competition by completely missing the target at 25 yards. You think I felt foolish, you bet I did.

Start from the ground up
Everything starts with your feet. They are the table on which everything else is built. Many people like to stand like a golfer with both feet in line making a point towards your target. It can work pretty well for most, but you’d be amazed at how much better your form can get with just a couple minor adjustments.
First, while you’re out shooting, take your front foot and move it one inch to the side. Take a few shots and then move it another inch over. After you’ve done this a few times, now move your front foot forwards by an inch. You’ll feel a difference in which muscles are tightened and how it feels with the alignment of your bones. You should also try this with your back foot as well. For me, I found that having my front foot forward about three inches gave me the best alignment and muscle contraction repeatedly.
Squeeze it
Tighten your abs and back when you are shooting. I found that when I consistently tightened up my core as I was shooting that I had less shaking and more stability. If you think of yourself as a table, the feet are the base and your torso is the trunk so you need to make sure that it stays the same for each shot. All that being said, you still need to try shooting with a relaxed torso and a tightened one to see which works for your body the best.
Let your bones do the work
Muscles wear out a lot faster than bones. If you hold the bow straight out to the side with your arm in line with your shoulders, you’ll be letting your bones take the brunt of the force of holding the bow. This doesn’t seem like a big deal for a few shots, but when you’re shooting hundreds of shots it gets really tiring.
This also applies to pulling back the bow a bit. Drawing back on the bow when you have bad posture or are too weak will make you use more muscles and experience more fatigue faster. So don’t, even though it’s really easy.
Be efficient
The best thing to improve accuracy is to be as efficient as possible. You want your muscles to last as long as they can with the least amount of fatigue. Pay attention to using large muscles to do most of the work. When you draw back on the bow, try to make your upper back muscles do all the work. They are the biggest muscle group and will last the longest. Using your biceps more will make your arm fatigue faster plus make your arm more shaky.
Uphill and downhill
Lots of times you aren’t shooting perfectly level. The biggest trick to getting better at these types of shots is to go back to the table idea. You want to make your base as solid as possible. Get a good footing and bend at the waist. You don’t want to change anything above your waist if possible. If you move your arms instead, you’ve completely changed your entire form and that causes more problems and increased fatigue.
It might feel silly at first, but it will make you more consistent and that means better accuracy.
Workout
Really? Yes, you need to work out your stabilizer muscles. Think about it, most people shake when their muscles are getting over used or are pretty fatigued. So work on the muscles that will get fatigued. The big one for me is my deltoids muscle, a.k.a. the shoulder. Just grab a 5-10 pound weight and hold it out like it’s your bow for about 5-10 minutes a day. That’s not so bad, but it will really improve your accuracy. You will have to see which muscles get tired the fastest or cause you the most issues after lots of shooting. Now I’m not a doctor so make sure you check with one of those guys if you need to.
Form shooting
This is a neat little trick too. The idea is to get 5-10 yards from a target and just shoot for the middle. You’re not trying to aim at all. The whole point is to feel your body is moving the exact same way. Don’t even pay attention to aiming really. You can also try shooting with your eyes closed, be extremely careful, to see if your arrow ends up in the same spot. You’re just focusing on consistently taking the same actions with your body.
Pre-shot routine
Archery is a huge mental game. Come up with a routine that is short, but that you do every single time that you take a shot. It could be something simple like taking a deep breath or a little more complex like rubbing your hands and picking your nose. It doesn’t really matter as long as it prepares your mind to do take the shot. I actually learned this from some golfers saying the it really upped their game because it helps you to always get in the right frame of mind
I have an e-book that I recommend if you want help getting better at your game. There is loads of great information in it and I’m willing to bet that even the most experienced person will learn something. If you disagree, just tell me.
For more tips on archery education click here…
by Jackson | Mar 17, 2015 | Hunting Tips
It’s been rather rainy and cold over the last several days. After being stuck inside so much, sometimes it’s just nice to get outside and do something and to stretch my legs. It was one of these moments just a few days ago that I had a small revelation and joy that I wanted to share.
I was out walking around a lake that’s very close to my house and I was just going around and hiking. I’m a fan of hiking and it’s an easy way to get out a bit and relax. As I was going, I saw some tracks in the mud. I’m always a bit curious when I see tracks because I want to know when they were made and what kind of animal it was.
There are lots of places where you can go to learn this information, but it’s pretty neat looking back that I could figure out what kind of animal it was and what direction it was going in. Later on when I was hiking back out I found some more stuff that was neat.
I found a bedding area and then also an area that had been recently scavenged through with all sorts of grasses bent and moved out of their normal place. I’m not an expert by any means, but I do know that this is one of those fun skills that you can do and keep entertained all year-long and you don’t think about getting better at it, but when it comes time to put that information to work that it’s really helpful.
Tracking and the Art of Seeing: How to Read Animal Tracks and Sign
The above link is to a book on tracking. I briefly read through bits here and there over the course of a year. I never really went in-depth on studying it really good except to tell the difference between hogs and deer. It’s kind of neat what you pick up though. To look around for damaged limbs, scat, or scrapings that can help you figure out what happened is a neat skill to pick up.
It sure makes me feel like I’m a better outdoorsman. I really don’t think I’d ever need to know how to survive in the wild to live there, but then again, no one ever plans on being forced to. Without being forced to study it, I liked it and when I found something that I didn’t know, I could just come back and take a quick look to see what I thought it was.
So that’s my rainy day archery story. Sorry if it wasn’t super exciting, but I really enjoyed being out side walking around and felt that just the smallest bit of extra knowledge made it more enjoyable.
Anyways, just a thought on how doing small things throughout the year can help you learn more and be a better outdoorsman with just a few minutes a month.
photo credit


